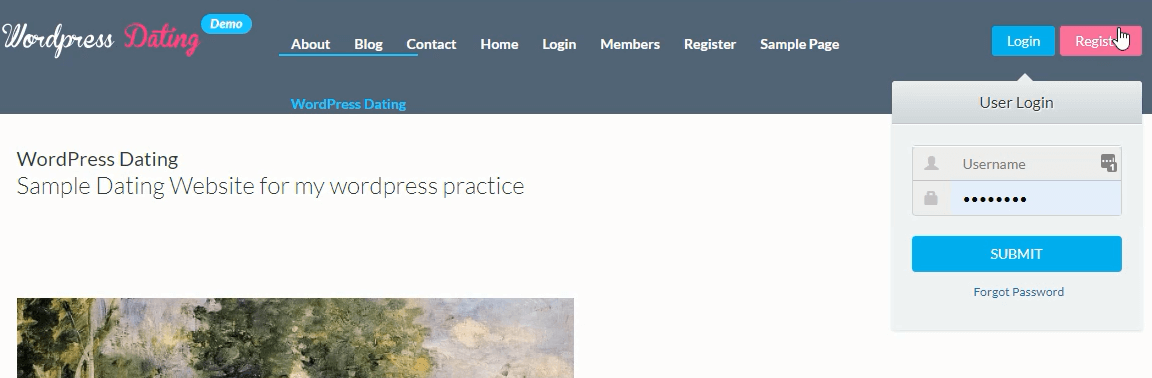
Setting up Facebook Login for WordPress Dating Plugin
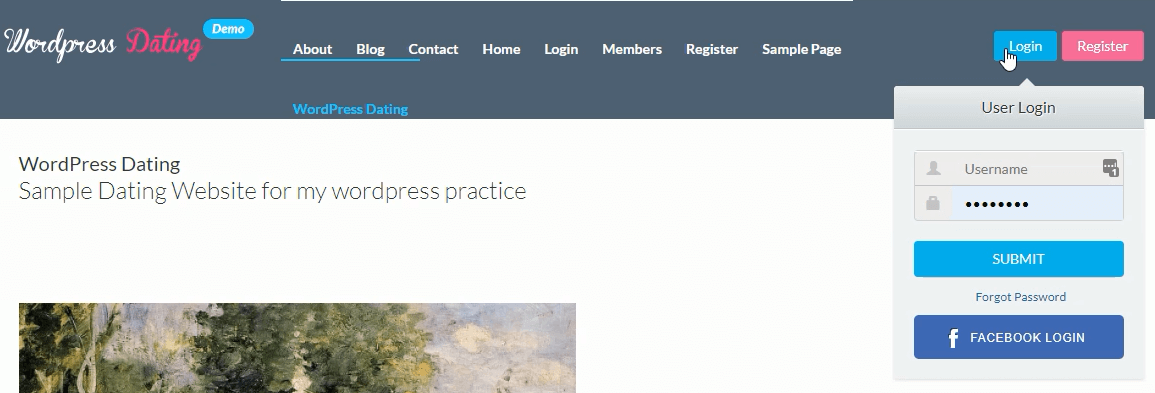
If you’re using DSP Dating plugin version 4.8.4 or above, you should be able to use Facebook Login feature now.
To begin using Facebook Connect you must obtain API Key and Application Secret from Facebook. To do so, you should first sign in to Facebook at http://facebook.com.
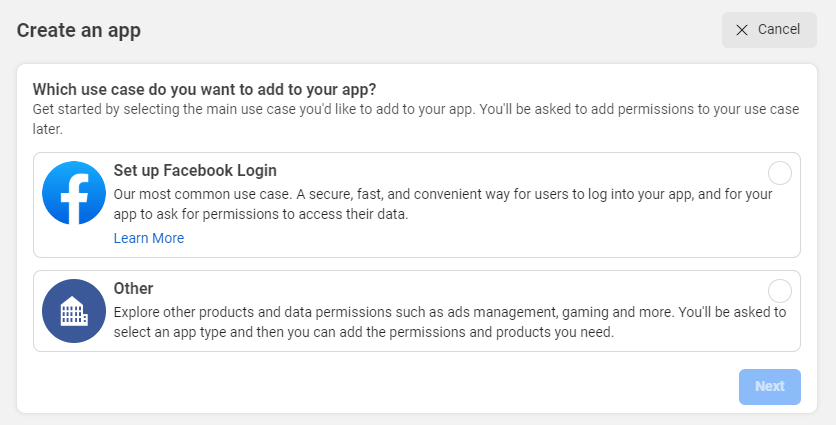
After signing in you need to go to https://developers.facebook.com/and click “My Apps” from the navigation bar and click on Create App
In the Create an app dialog box, select the Set up Facebook Login option and click on Next.
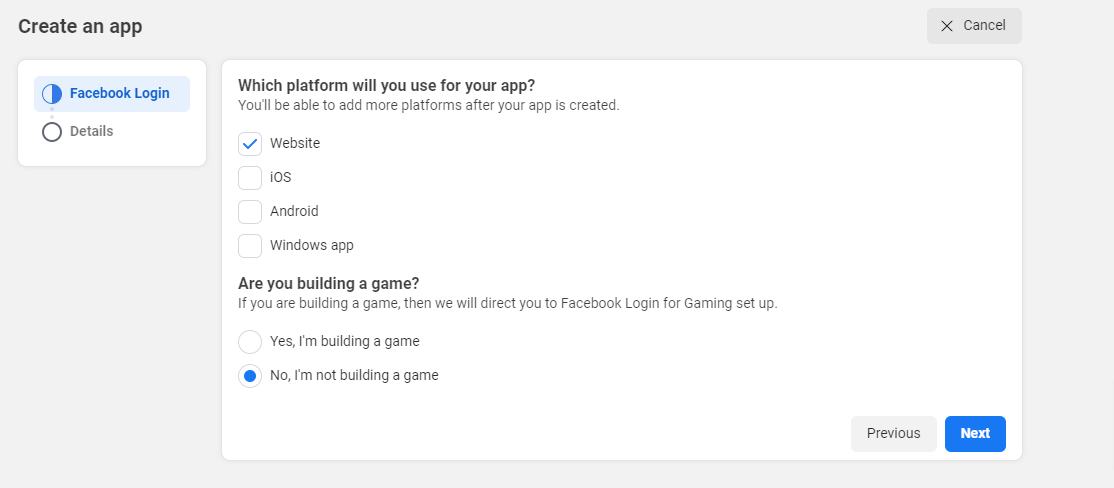
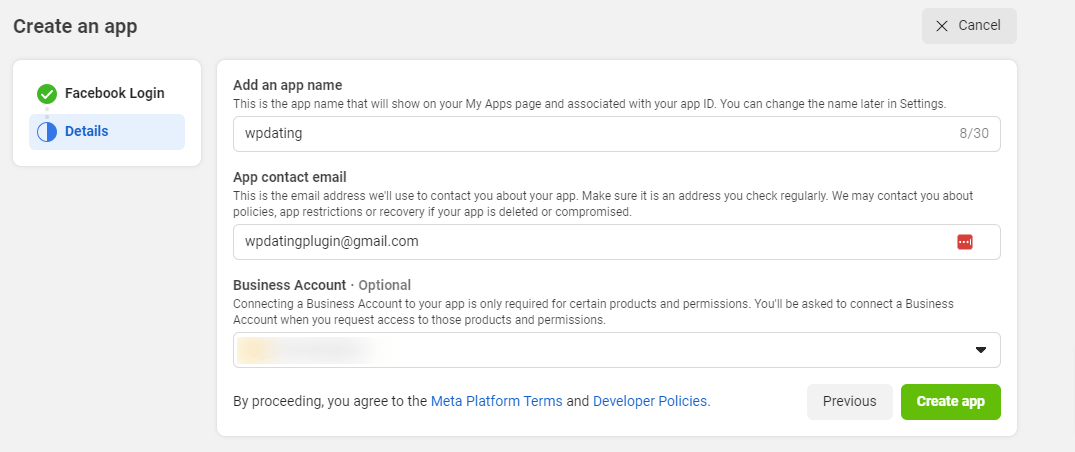
On the next page, select the Website option and No, I’m not building a game option and click on Next. Add an app name and also Add contact email. You can also add Business Account but it is optional and click on Create App button.
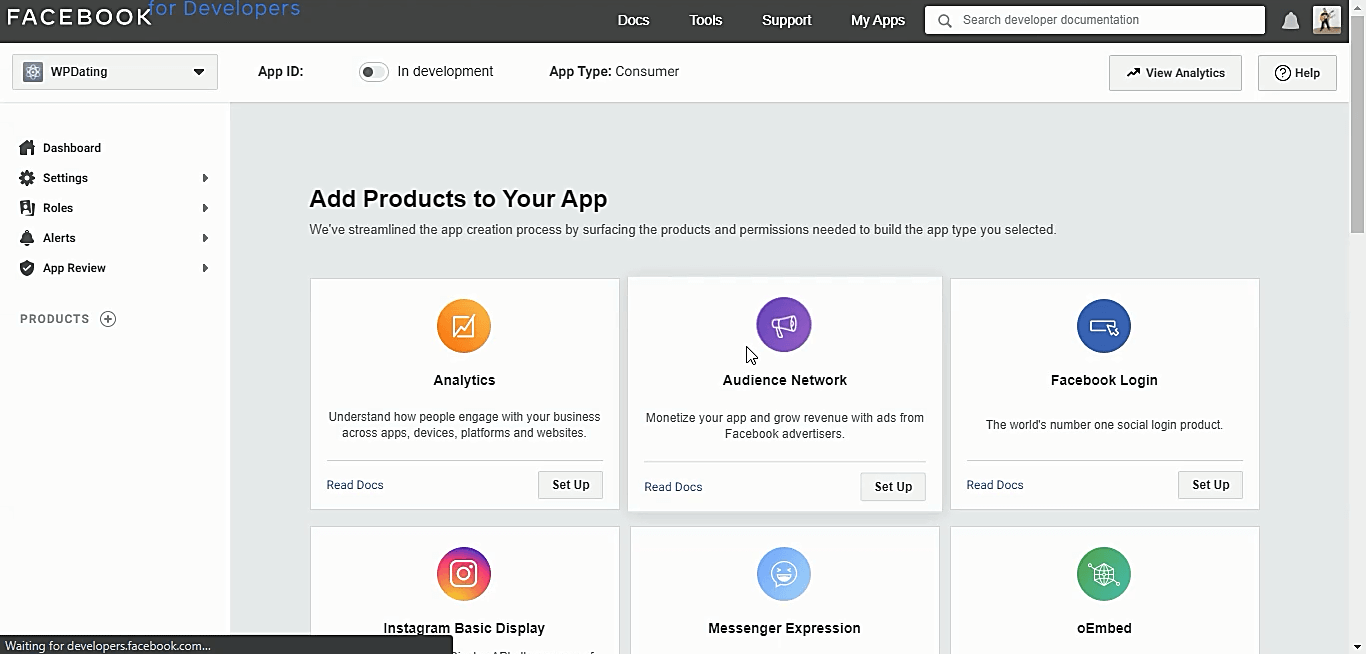
Then, setup “Facebook login” from “Add Products to your App”.
Then, set up “Facebook login” from “Add Products to your App”.
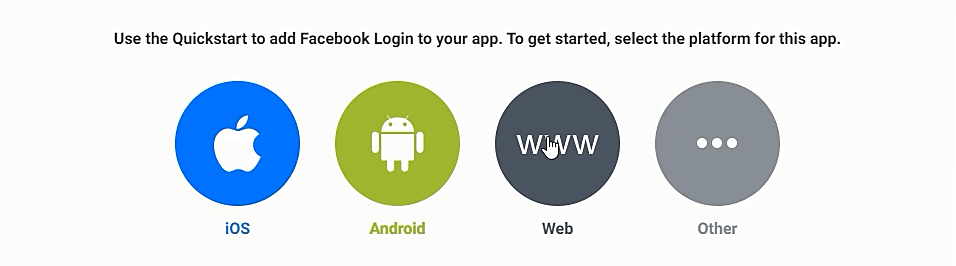
In the next step, select “Web” which has the image of WWW.
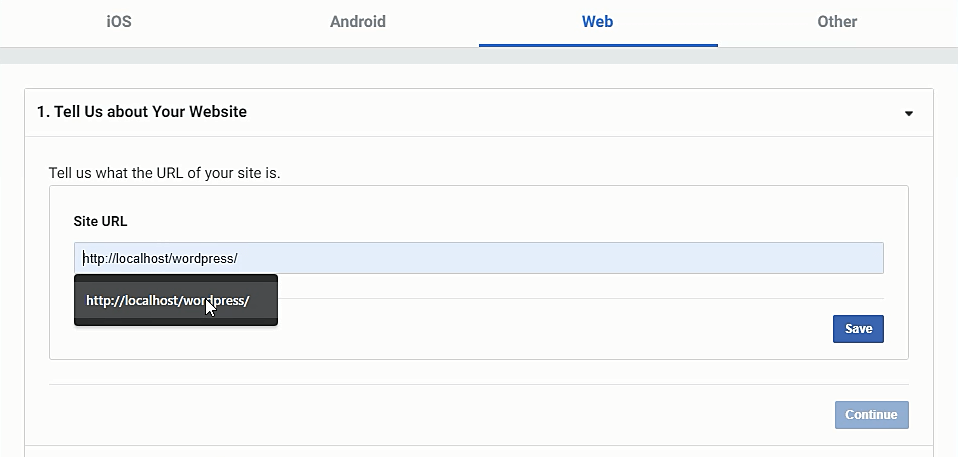
Then, in the “Tell us about your website” dropdown menu, enter your site URL. I am using a local server in this example, you can enter your domain and click on “Save” button and “Continue” button.
In rest of the steps, you can simply click on “Next” or skip them and jump to another step.
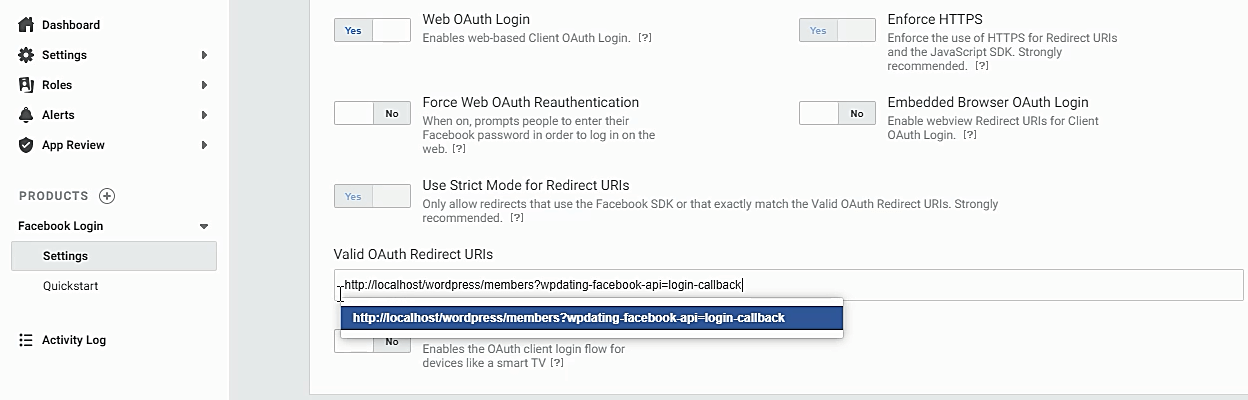
Similarly, under the “Facebook Login” sidebar dropdown panel, click on Settings and enter “https://yoursitename.com/members?wpdating-facebook-api=login-callback” under the “Valid OAuth Redirect URLs” and click on “Save Changes” button at the end as shown in the image below:
Then, click on “Settings” on the sidebar panel and click on “Basic”. You will be able to see “App ID” and “App Secret” as shown in the figure below:
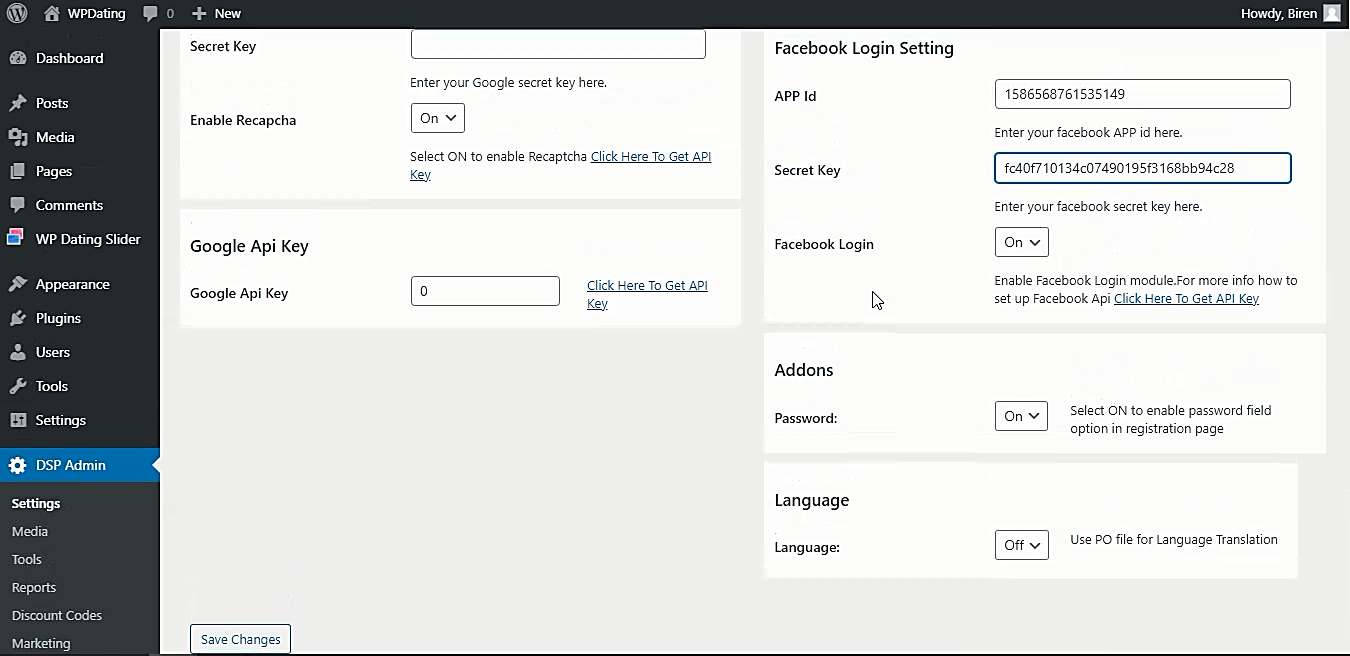
Now, go to your WordPress Admin Panel, from your sidebar panel, click on “DSP Admin” Settings, click on “General” menu (also, it is automatically loaded when clicked on DSP Admin) and scroll down to “Facebook Login Setting”.
Enter the “App ID” and “Secret Key” in the fields given and click on “Save Changes” button at the bottom of the page. Now, Restart your site. You should be able to see “Facebook Login” feature added to your site.
If there is any confusion or get stuck while following the steps as above, then please feel free to contact us at support@wpdating.com