There are six plugins required to set up WP Matrimony Theme properly: wpdatingmainplugin, wpdating-elementor-add-on, dsp_login, Elementor Website Builder by Elementor.com, Contact Form 7 by Takayuki Miyoshi, andOne Click Demo Import by OCDI.
Out of which three plugins (i.e., Elementor Website Builder, Contact Form 7, and One Click Demo Import) you can install in the WordPress store for free. The other two will be provided by us.
Step 1-1 :
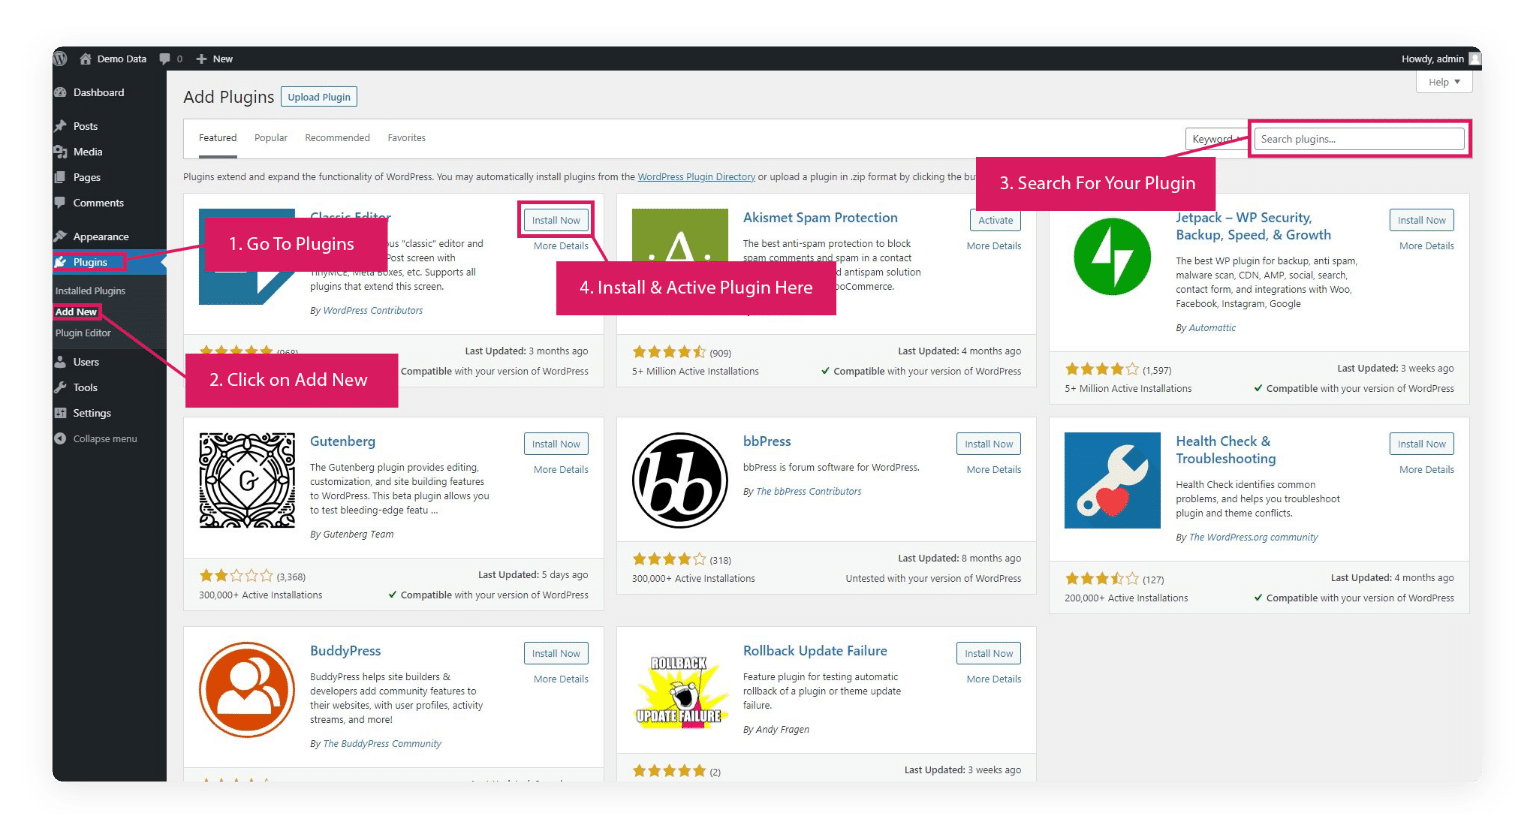
Installing Free Plugin(i.e., Elementor Website Builder, Contact Form 7, and One Click Demo Import).
Go to Plugins >> Add New. Search for the above plugins.
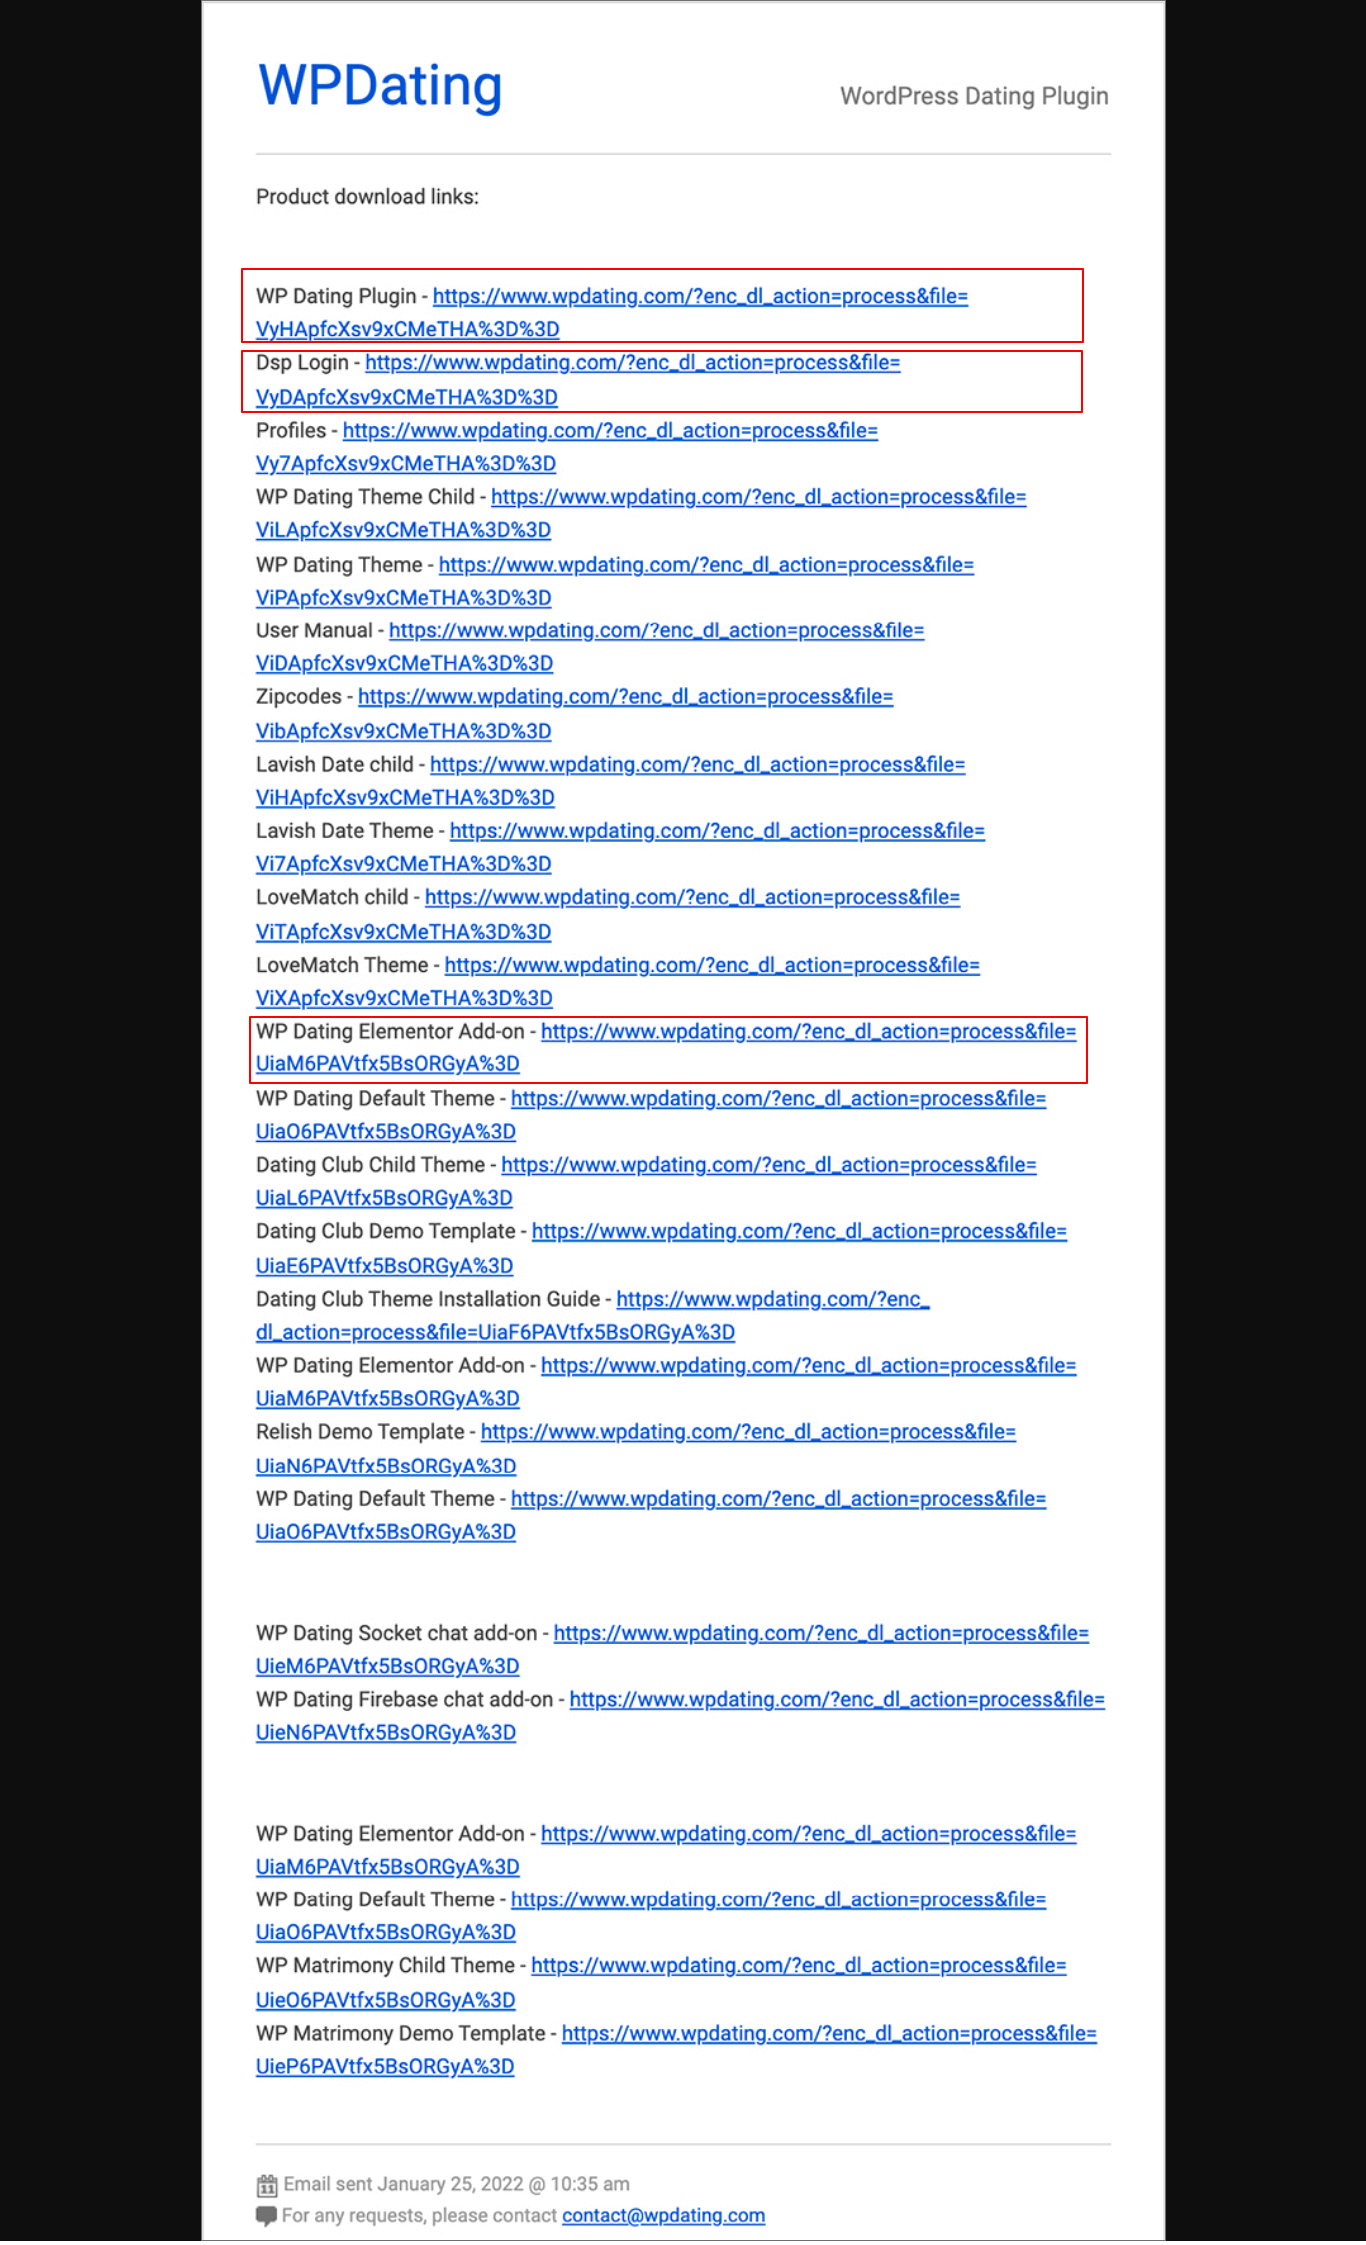
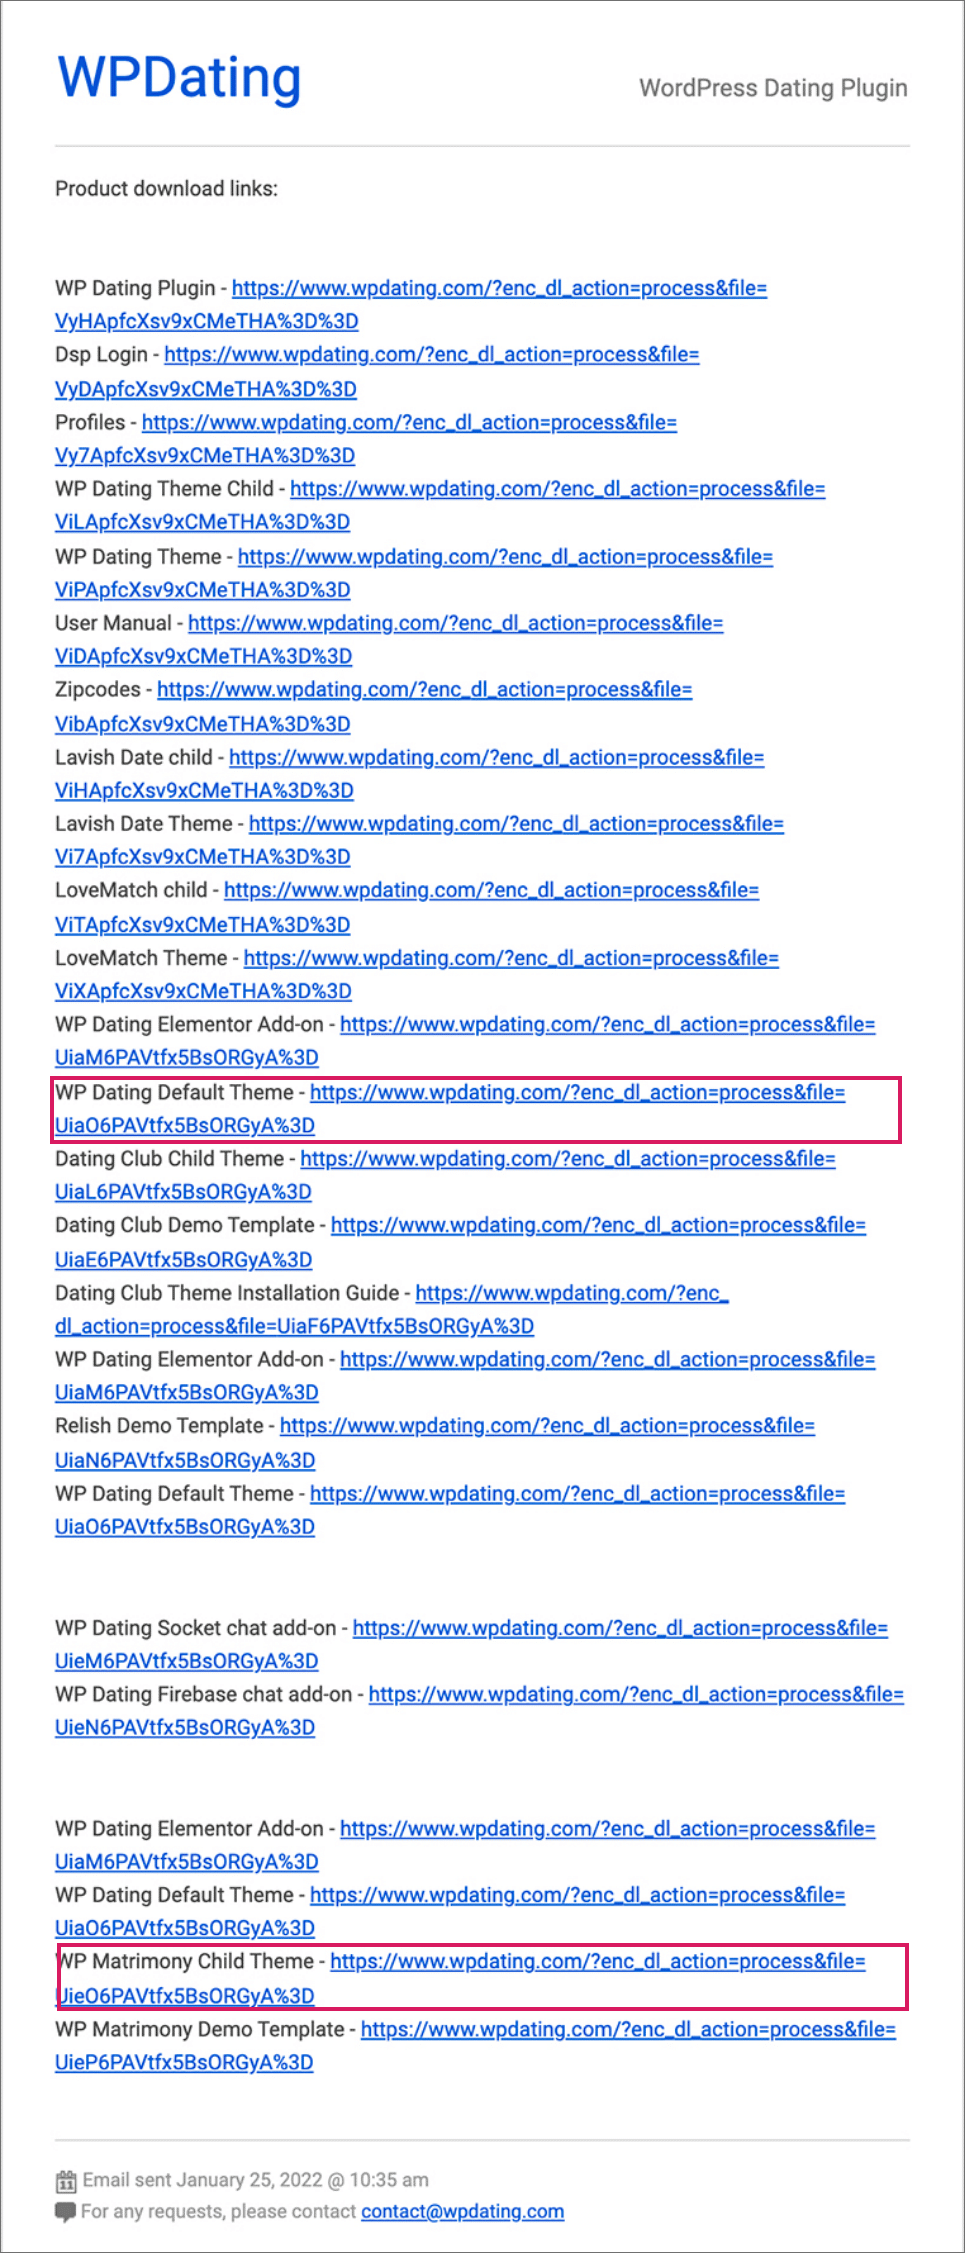
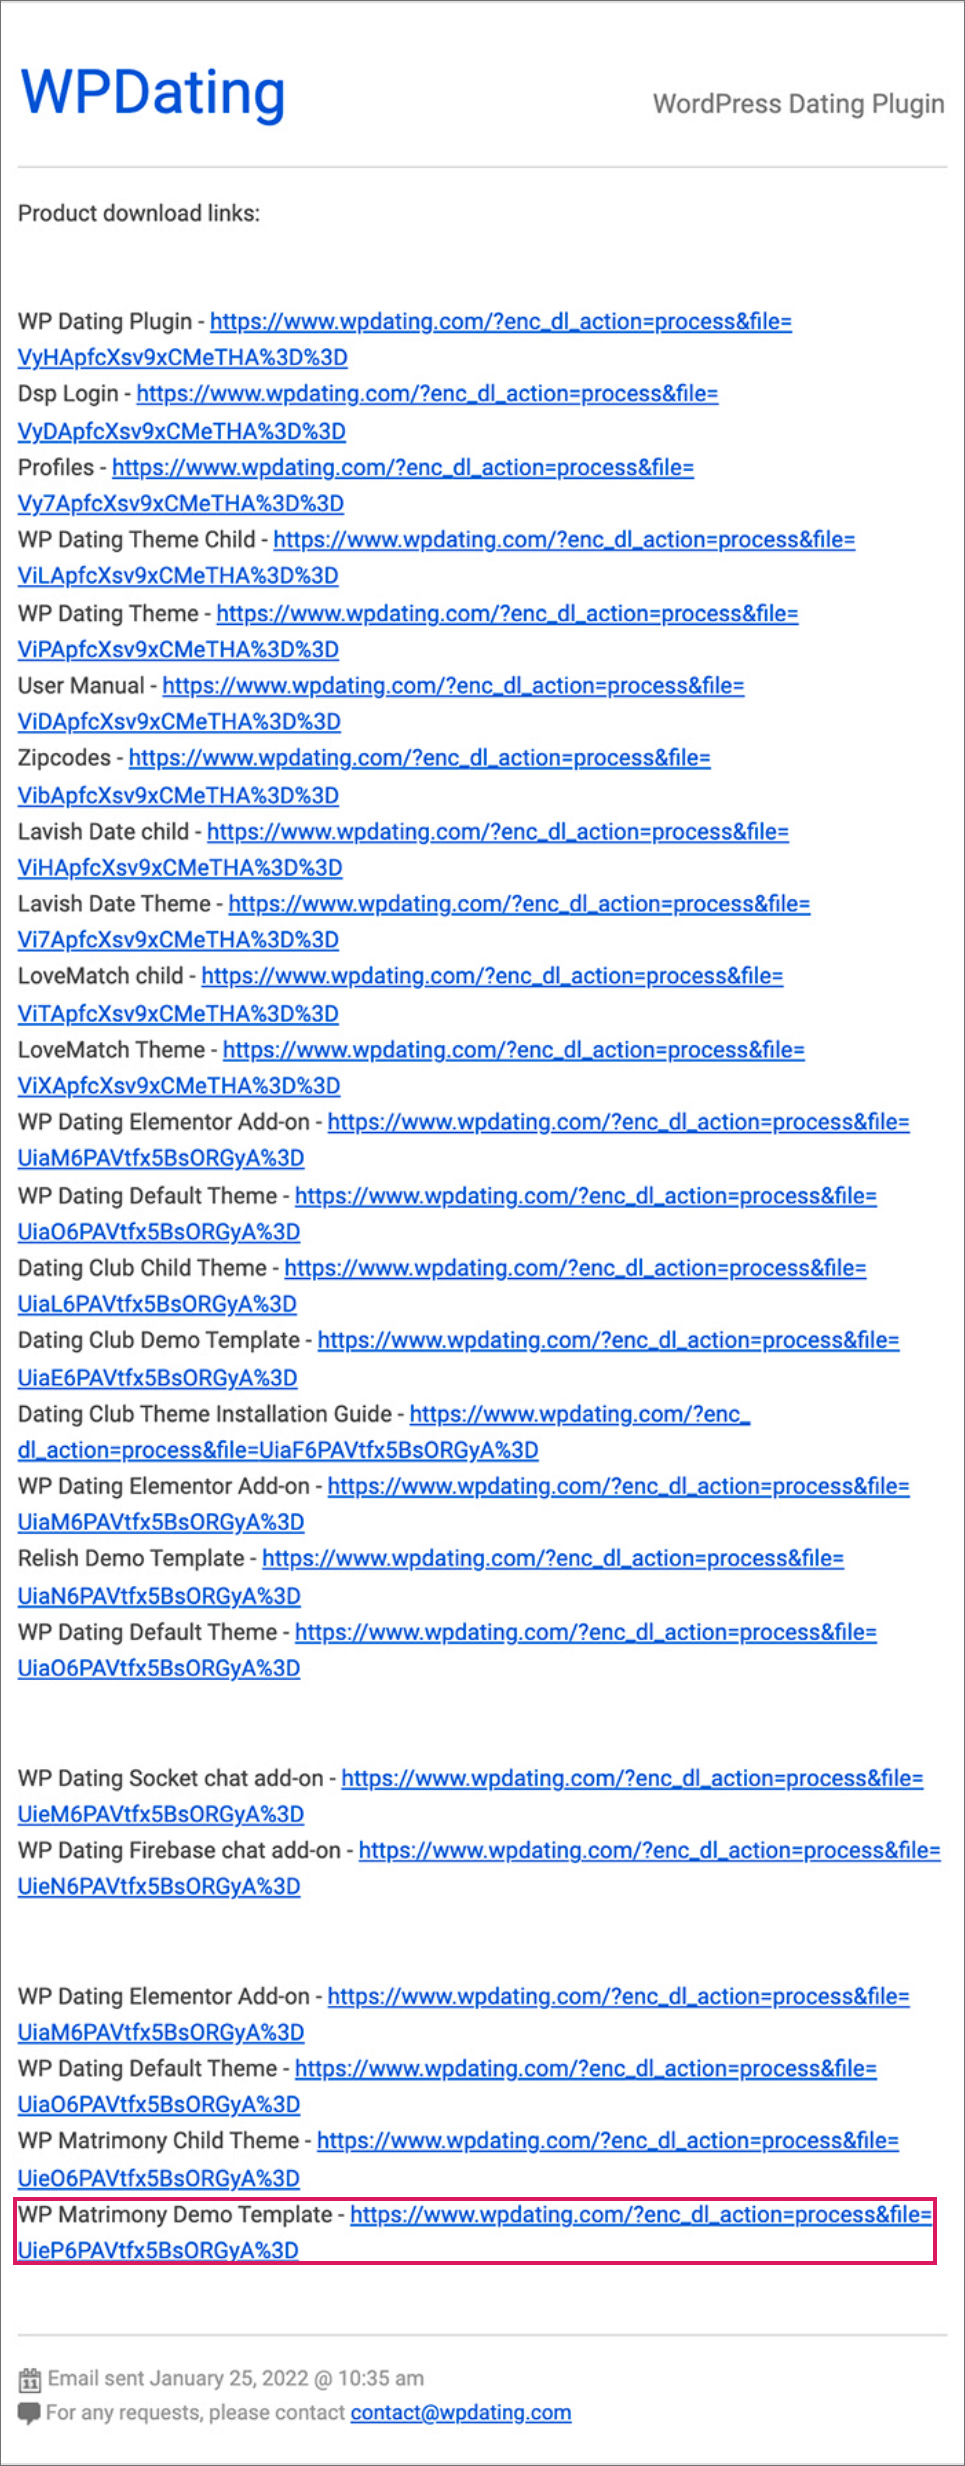
Please enter the email address used to purchase our product. You will then receive the download link at that email address. And you can download the plugin required for the next step, which is installing plugins provided by WP Dating. Please install and activate the plugins first. Activating the theme before the required plugins are active may cause a critical error on the website.
Step 1-2-1: Plugin Installation order
First: Install the WP Dating Plugin and activate it.
Second: Install the WP Dating Elementor Add-on Plugin and activate it
Third: Install the DSP Login Plugin and activate it.
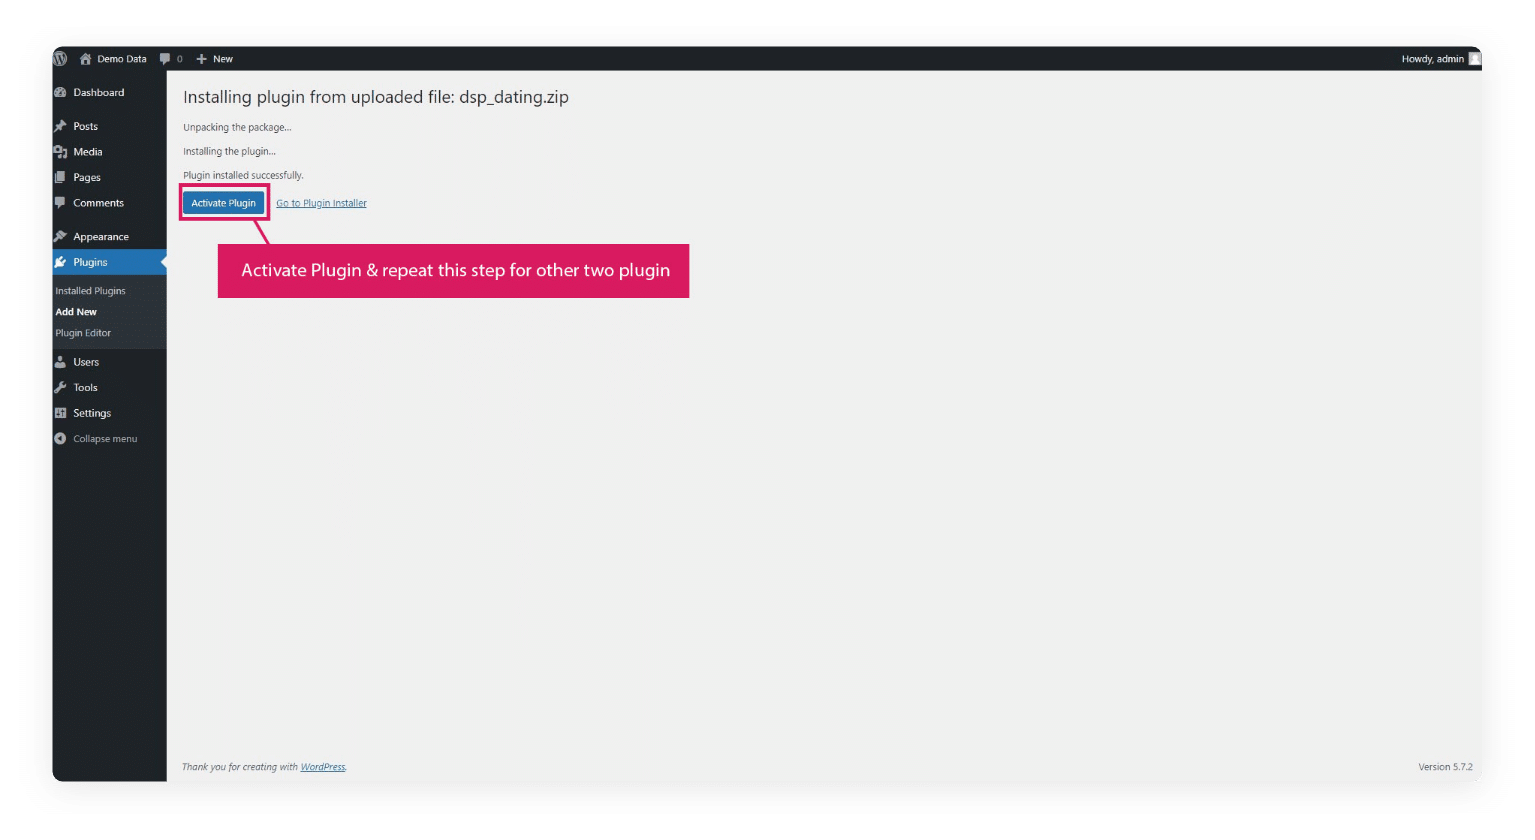
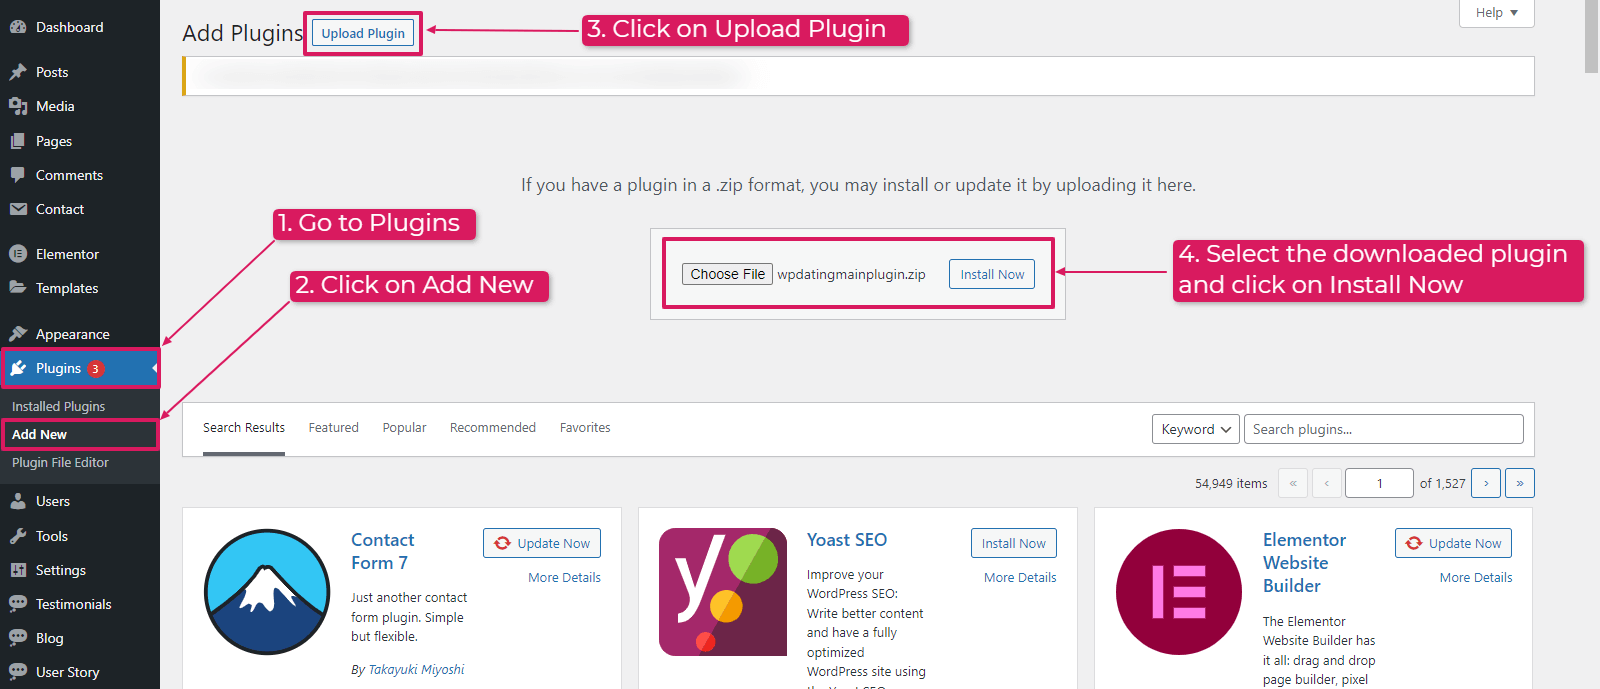
You will get the plugins in .zip format, which you can install easily following the below steps in the image.
Step – 2 Install WP Dating Default Theme
After installing all the required plugins, we will install our New and Improved WP Dating Default Theme. You can easily change your site’s brand color, upload logos for both Normal and Retina devices, upload footer logos, change typography, etc. In just a few clicks with ease.
Step 2 :
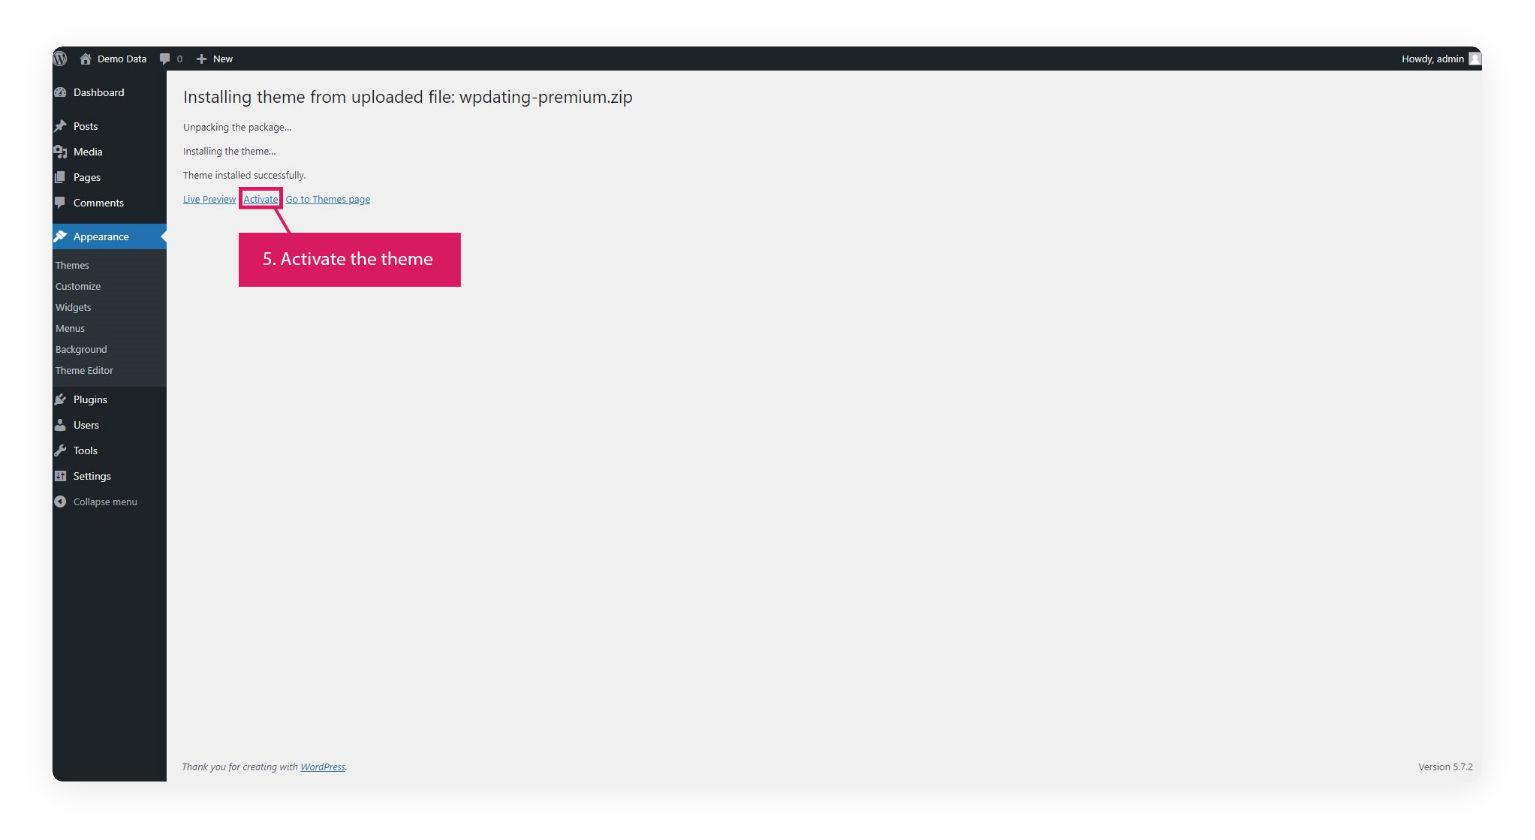
Installing our WP Dating Default ThemeandWP Matrimony Theme.
Go to Appearance >> Themes >> Add New. Install the WP Dating Default andWP Matrimony Theme and Activate the WP Matrimony Theme.
Step 3: Now, Let’s Import Our Demo Data
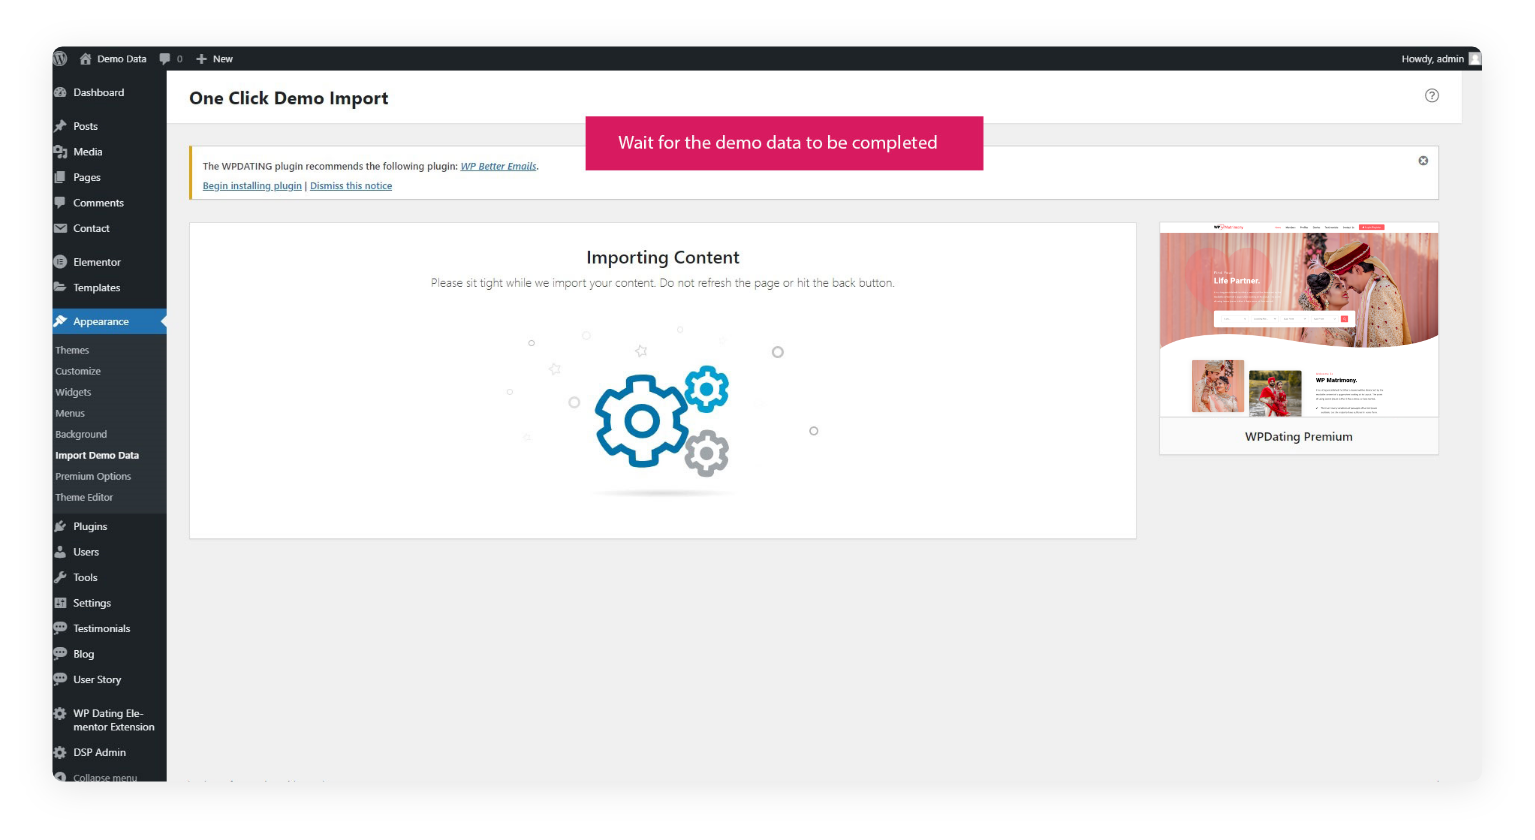
Now, after the theme is installed and activated, let’s import our demo data, including premade demo pages, images, templates, etc. That will automatically set up the demo pages.
You will get the link to download demo data in the same download package email.
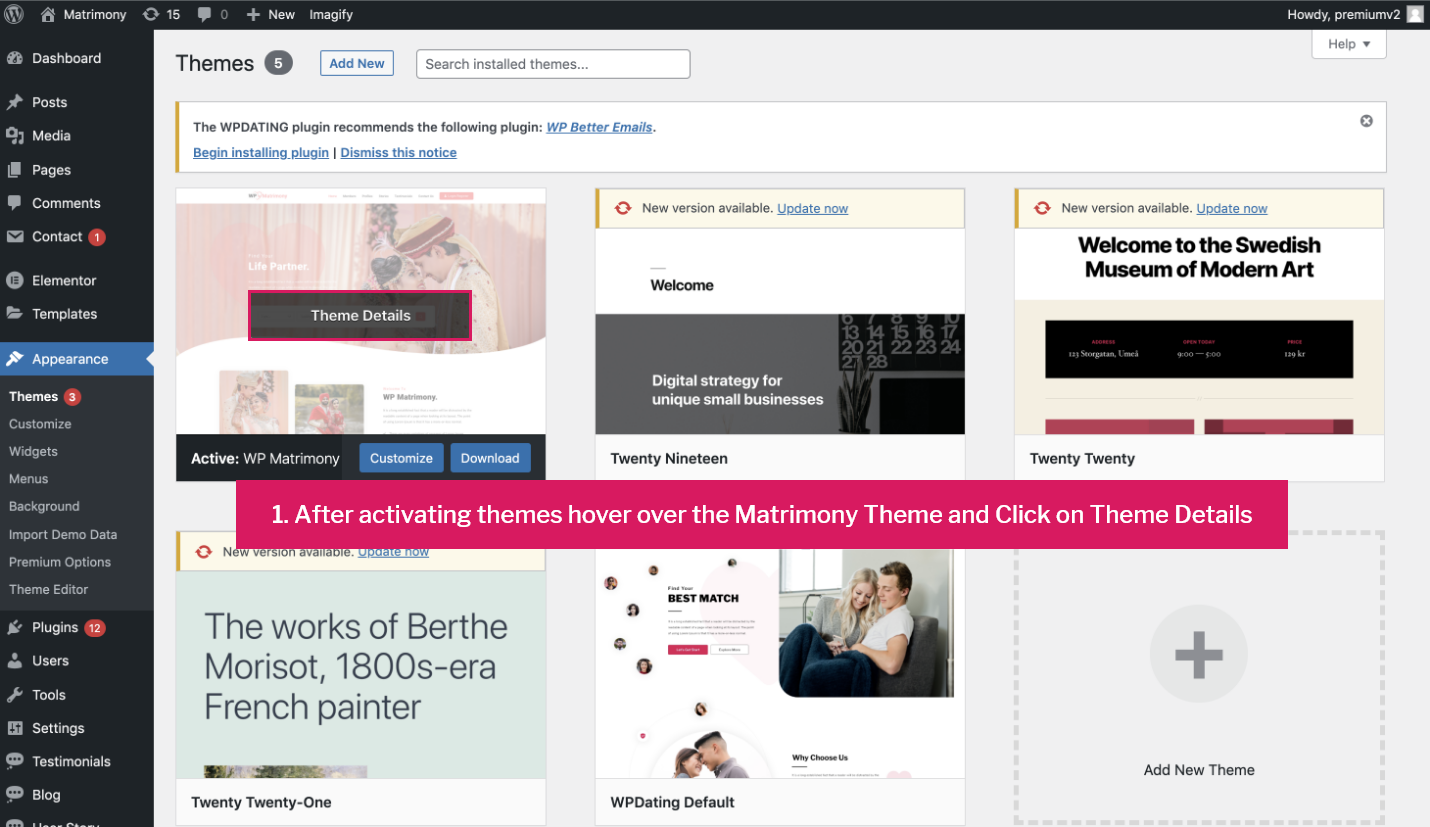
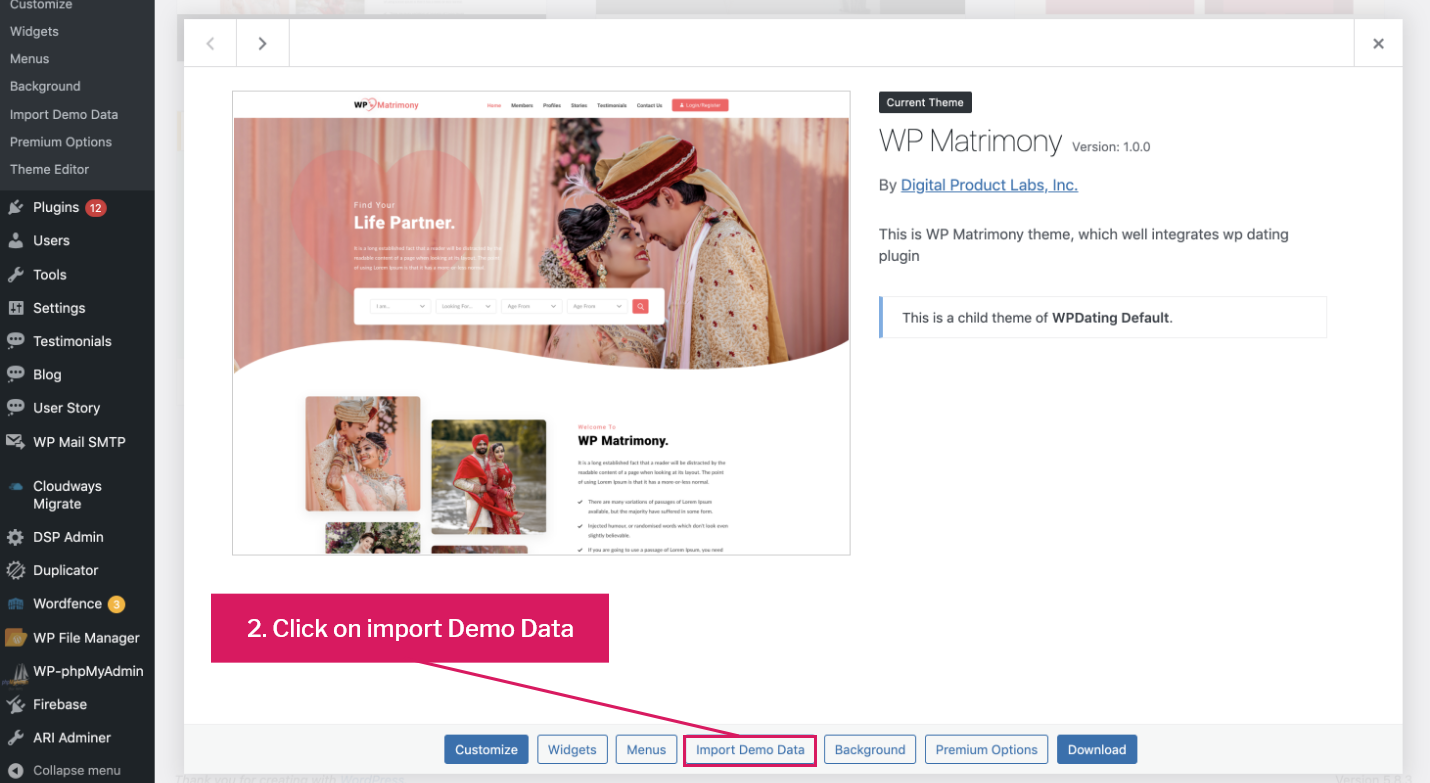
Go to Appearance >> Themes and click on the WP Matrimony theme to import the demo data.
Click on Import Demo Data.
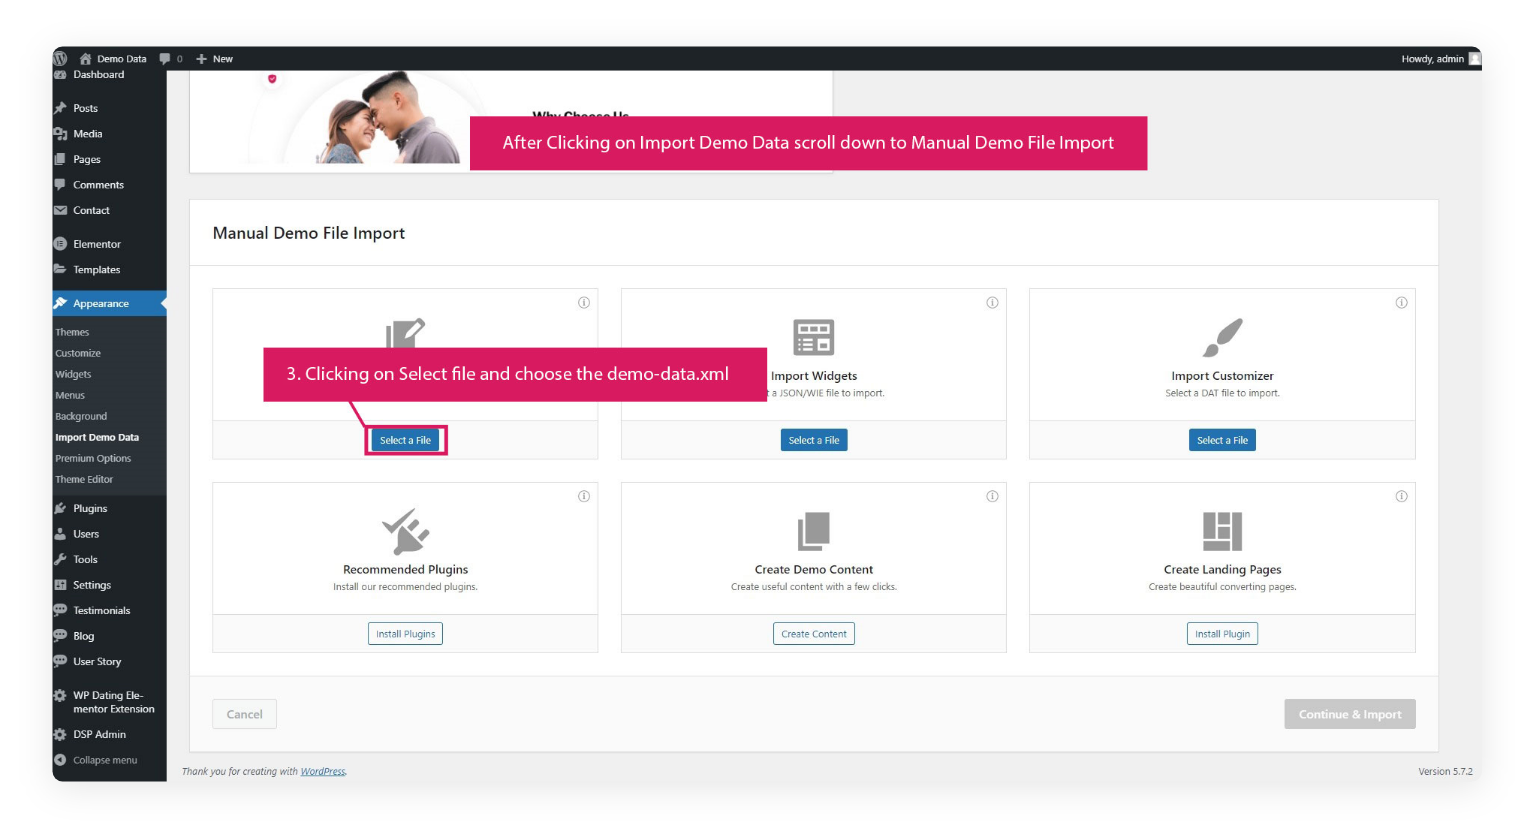
Import the demo data by importing demo-widgets-data.wie in Import Widgets. Then, import demo data by importing demo-data.xml in the Import Content section.
*** ATTENTION***
If you come across any error messages on the site, it’s likely because the installation process was not completed correctly. To resolve this, please refer to the installation documentation and carefully follow the instructions provided to set up your members page and profile page.
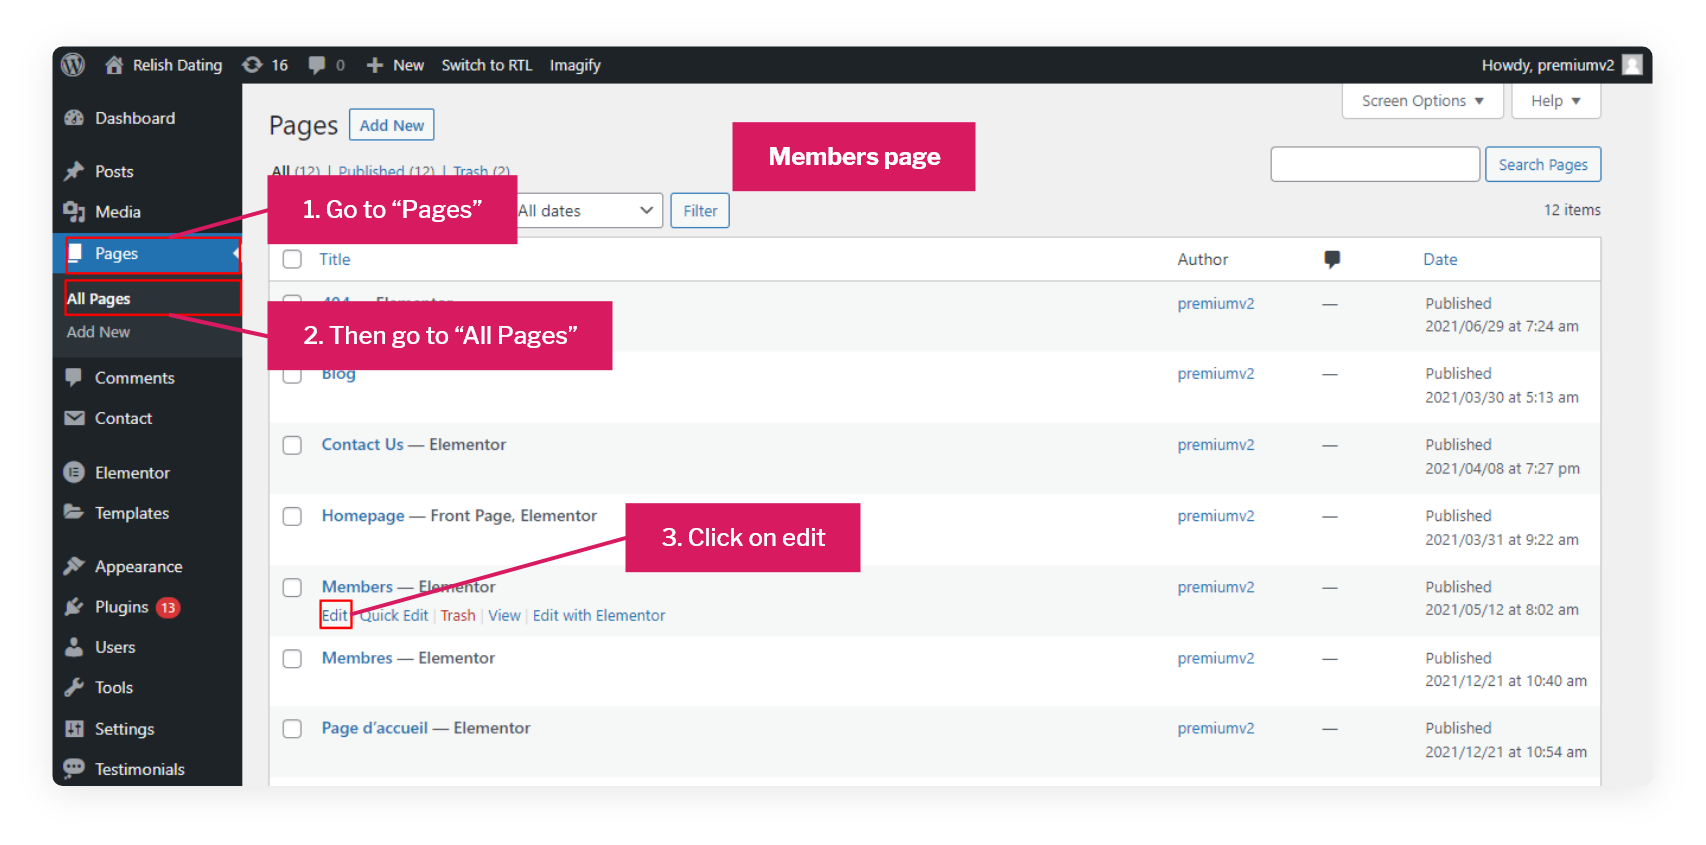
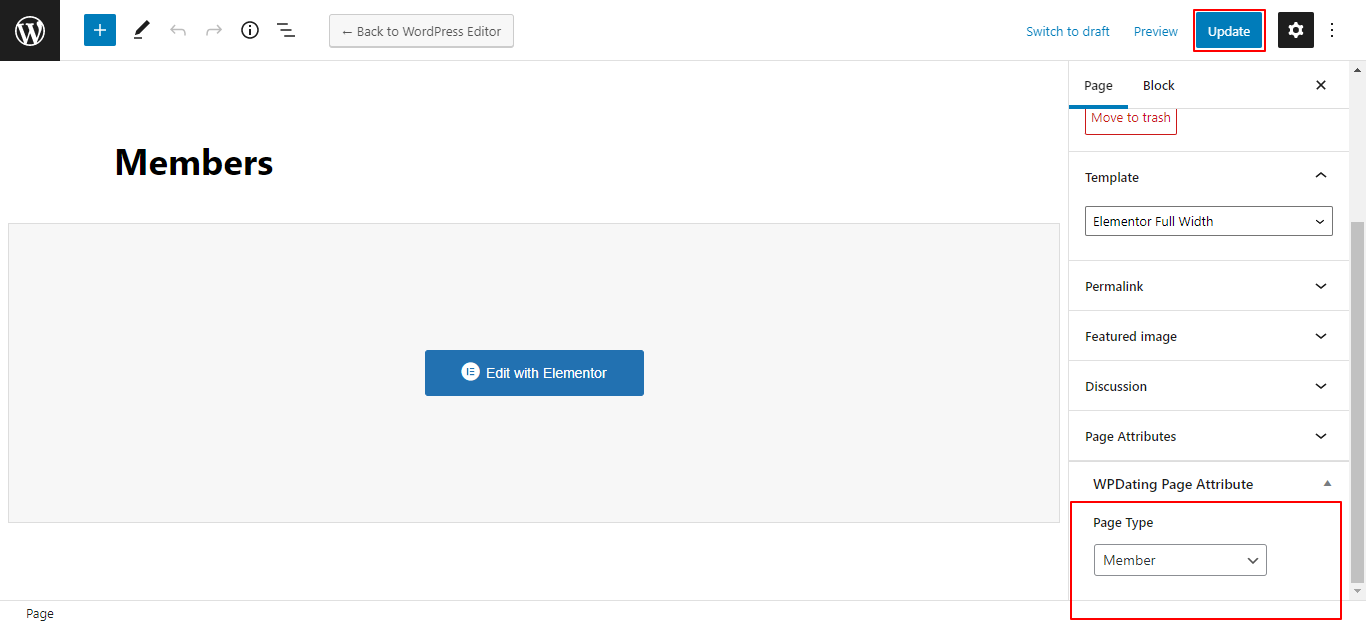
Now, Let’s set up our Members and Profile Page. Go to Pages >> All Pages. On your Members page, click Edit.
Select Page Type as Member and Update your changes.
*** ATTENTION ***
If you experience any difficulties saving pages, it could be related to your .htaccess file. Our professional support team is available to assist you in resolving this issue. Kindly reach out to them for prompt assistance.
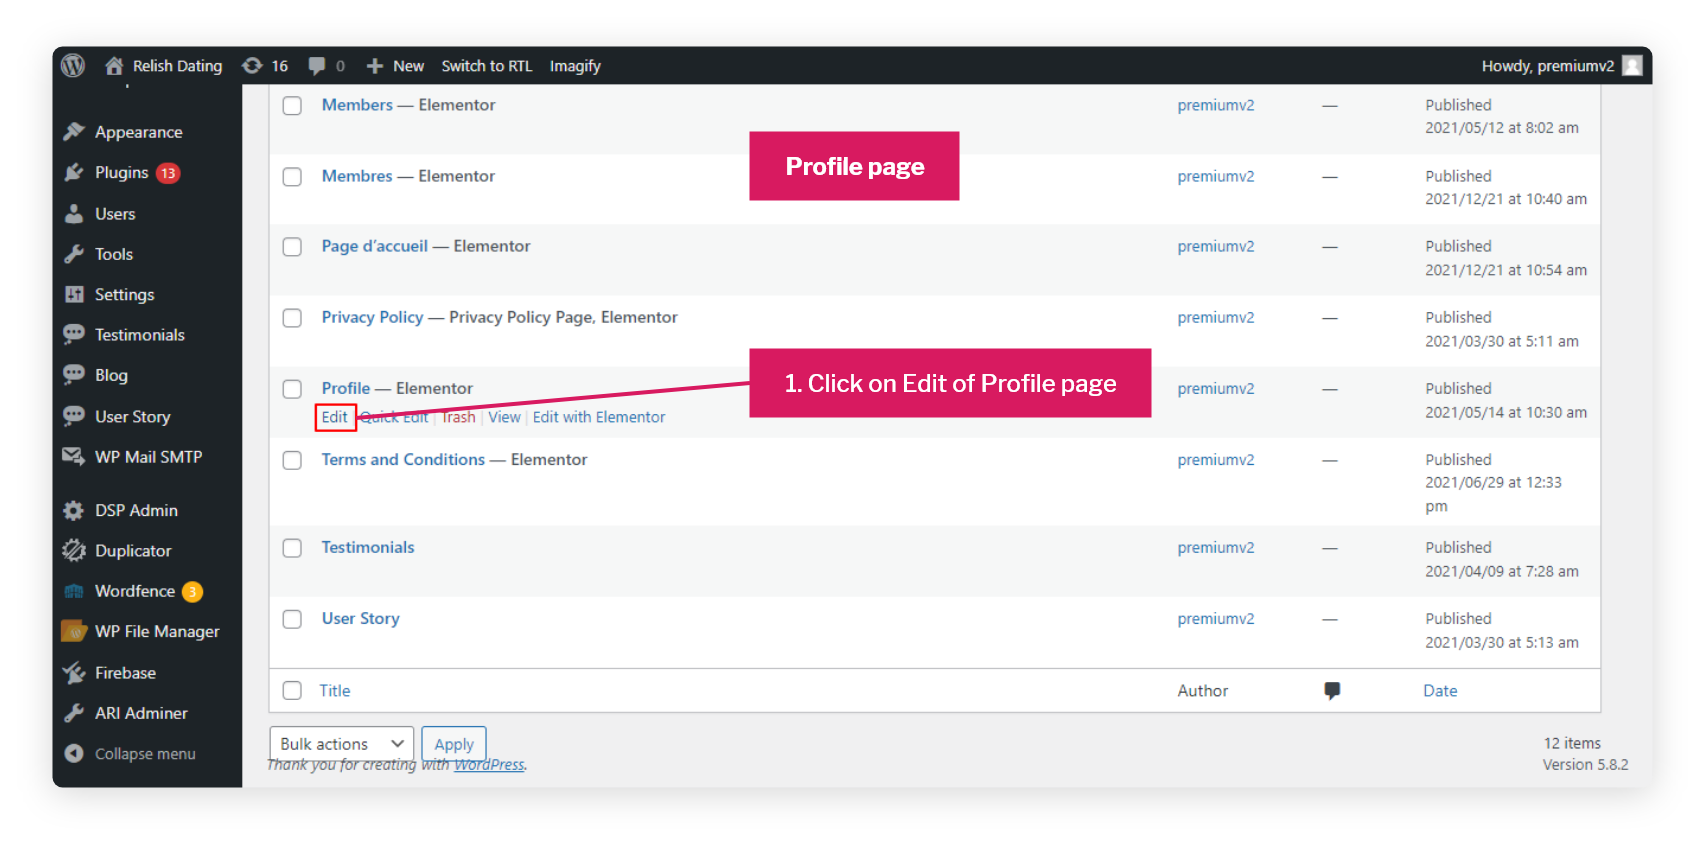
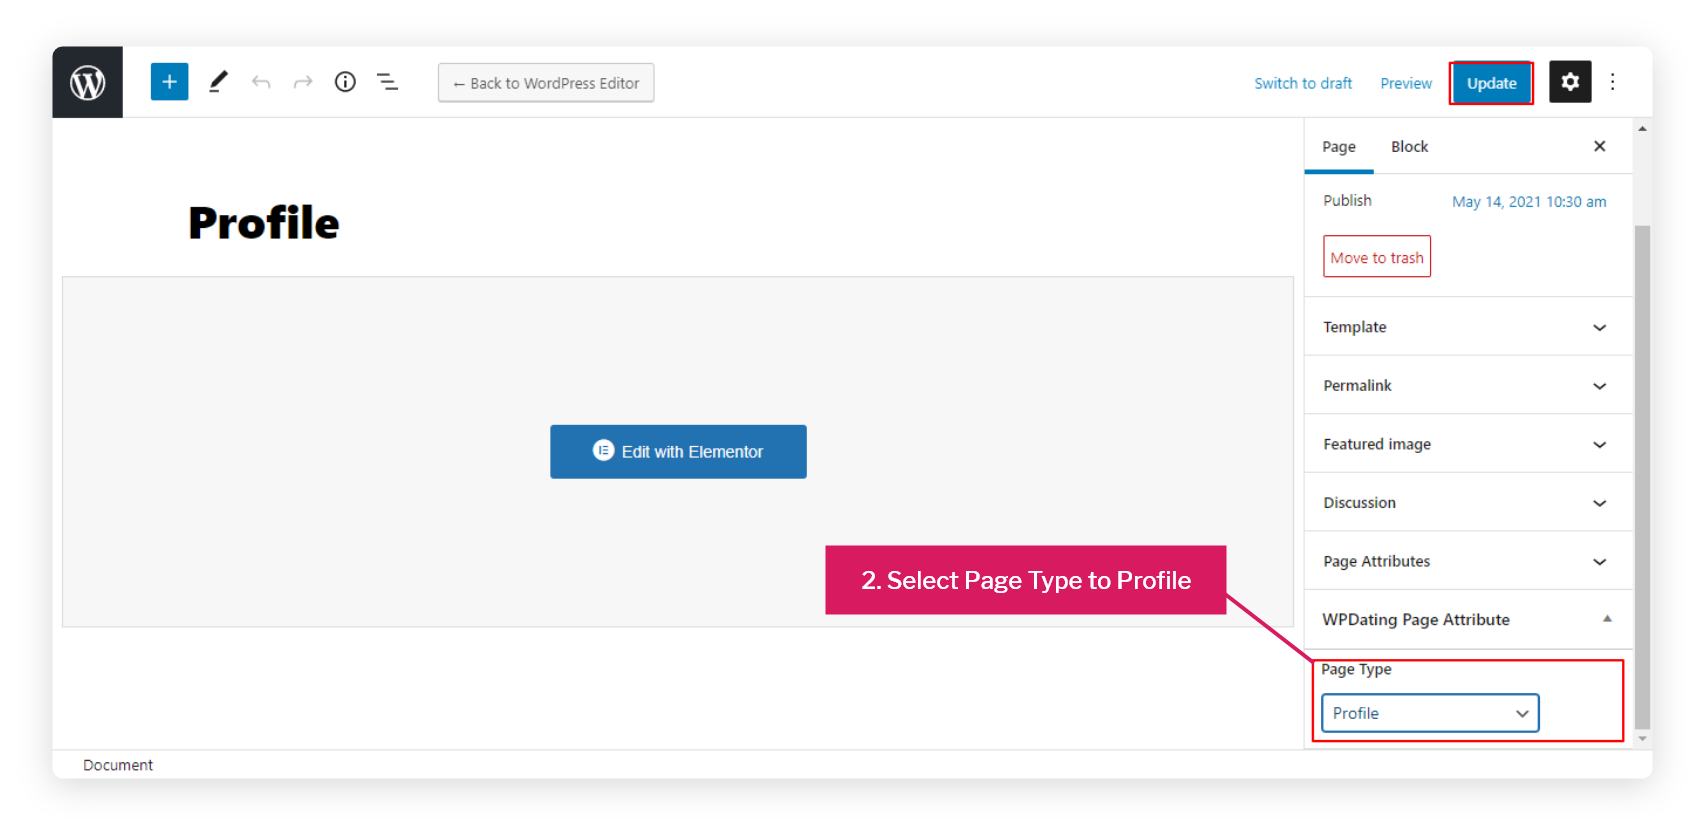
Now, do the same for the Profile page too. In the All Pages, click on Edit to edit the Profile page. Select Page Type as Profile and Update the changes.
Step 4: Setting Up Logo, default Pages, and Menus
Setting up logo, default pages(i.e., Homepage, Members page, and Profile Page), and Menus just got easier. Please follow the steps below one last time, and your site will be complete and ready to get going.
Step 4-1 :
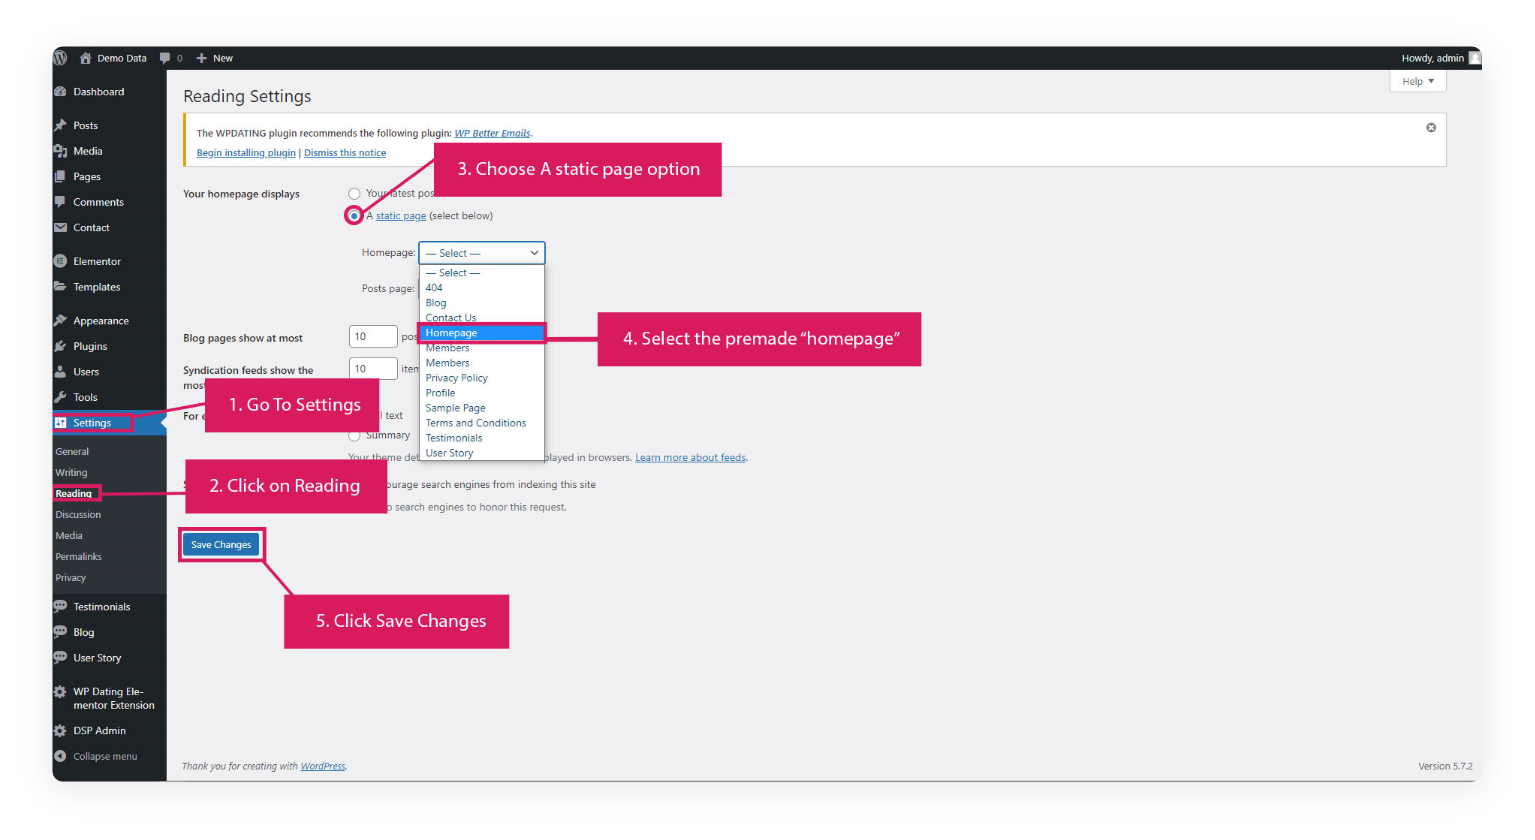
Let’s set up the Homepage:
Go to Settings >> Readings, choose a Static Page option, and select premade Homepage as FrontPage and Blog page as Post Page.
Step 4-2 :
After setting up the Homepage and Blogs page, Let’s add a logo and menu to our site.
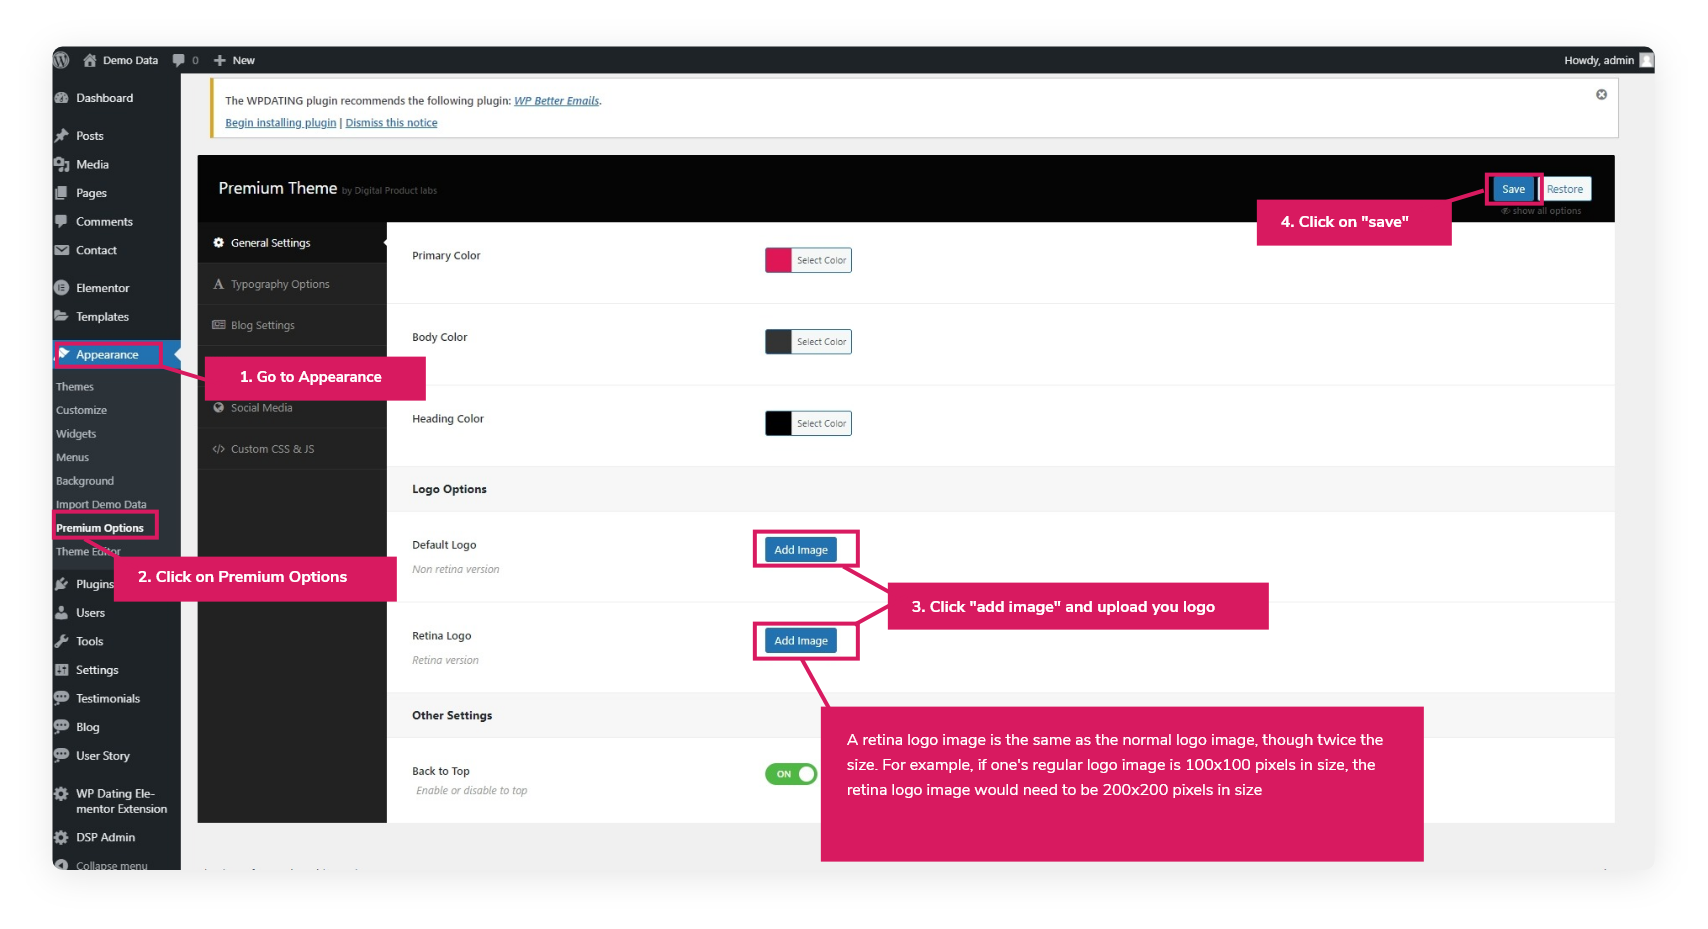
Go to Appearance >> Premium Options and add Default Logo and Retina Logo(A retina logo image is the same as the normal logo image, though twice the size. For example, if one’s regular logo image is 100×100 pixels in size, the retina logo image would need to be 200×200 pixels in size)
After uploading logos, click on Save to save your changes.
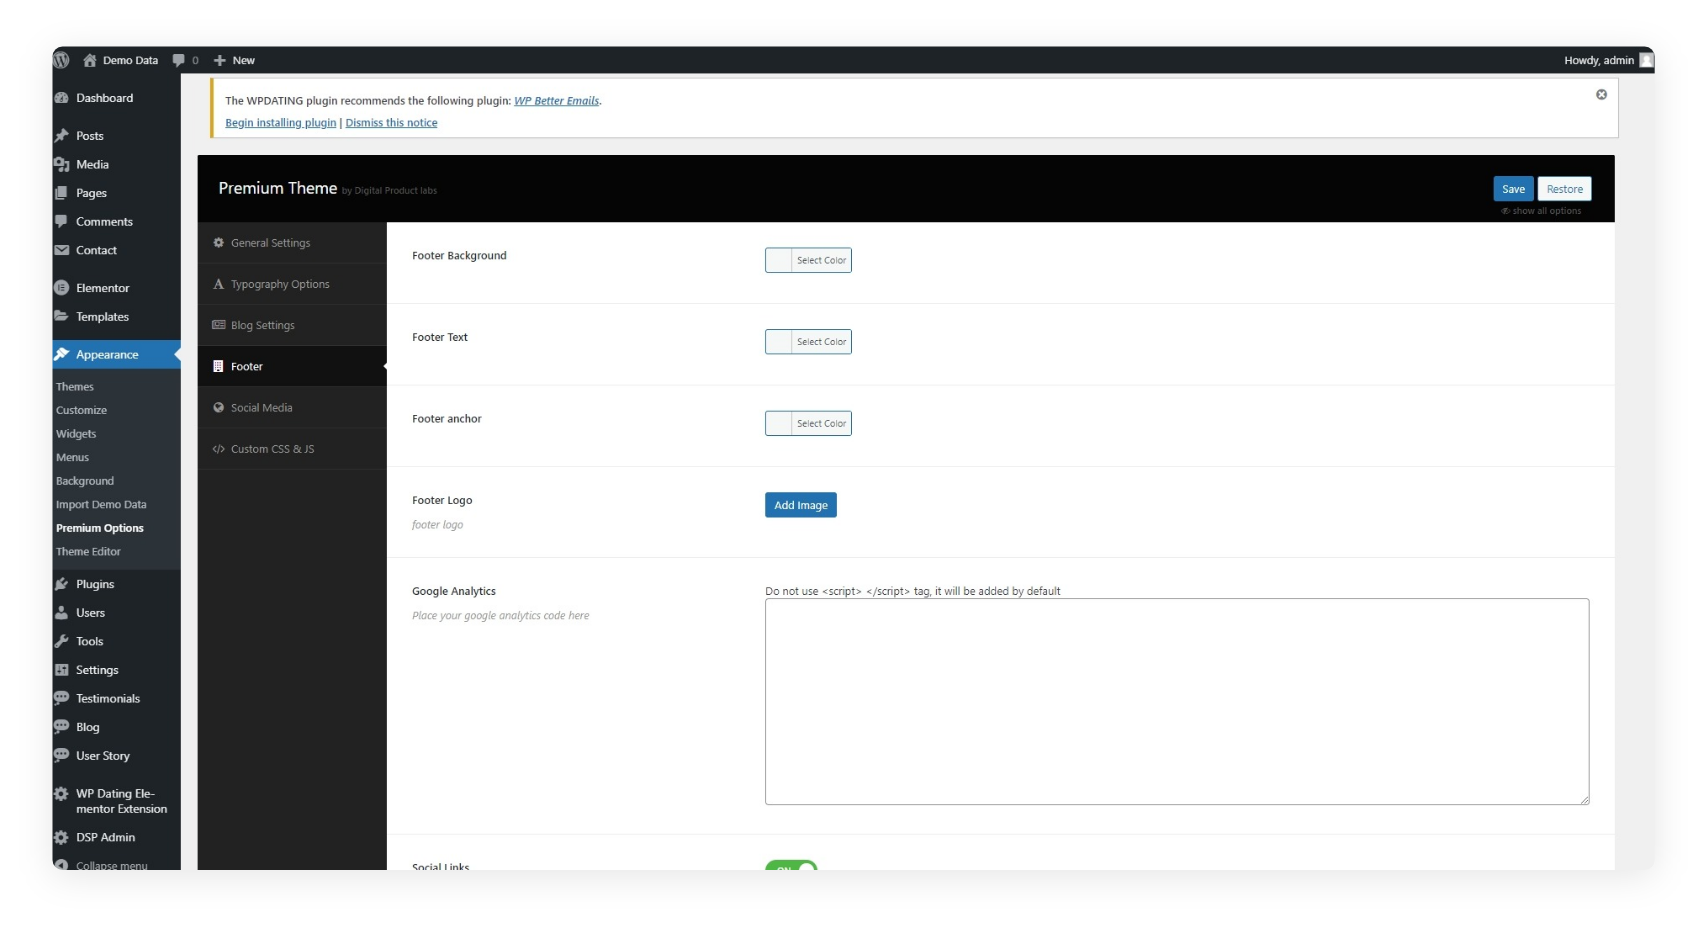
Now, Let’s add the Footer logo and Copyright text. After you have finished with the header logo, click Footer in the theme option. Upload your footer logo. Don’t save yet; stay on the footer option and scroll down to enter copy-right content.
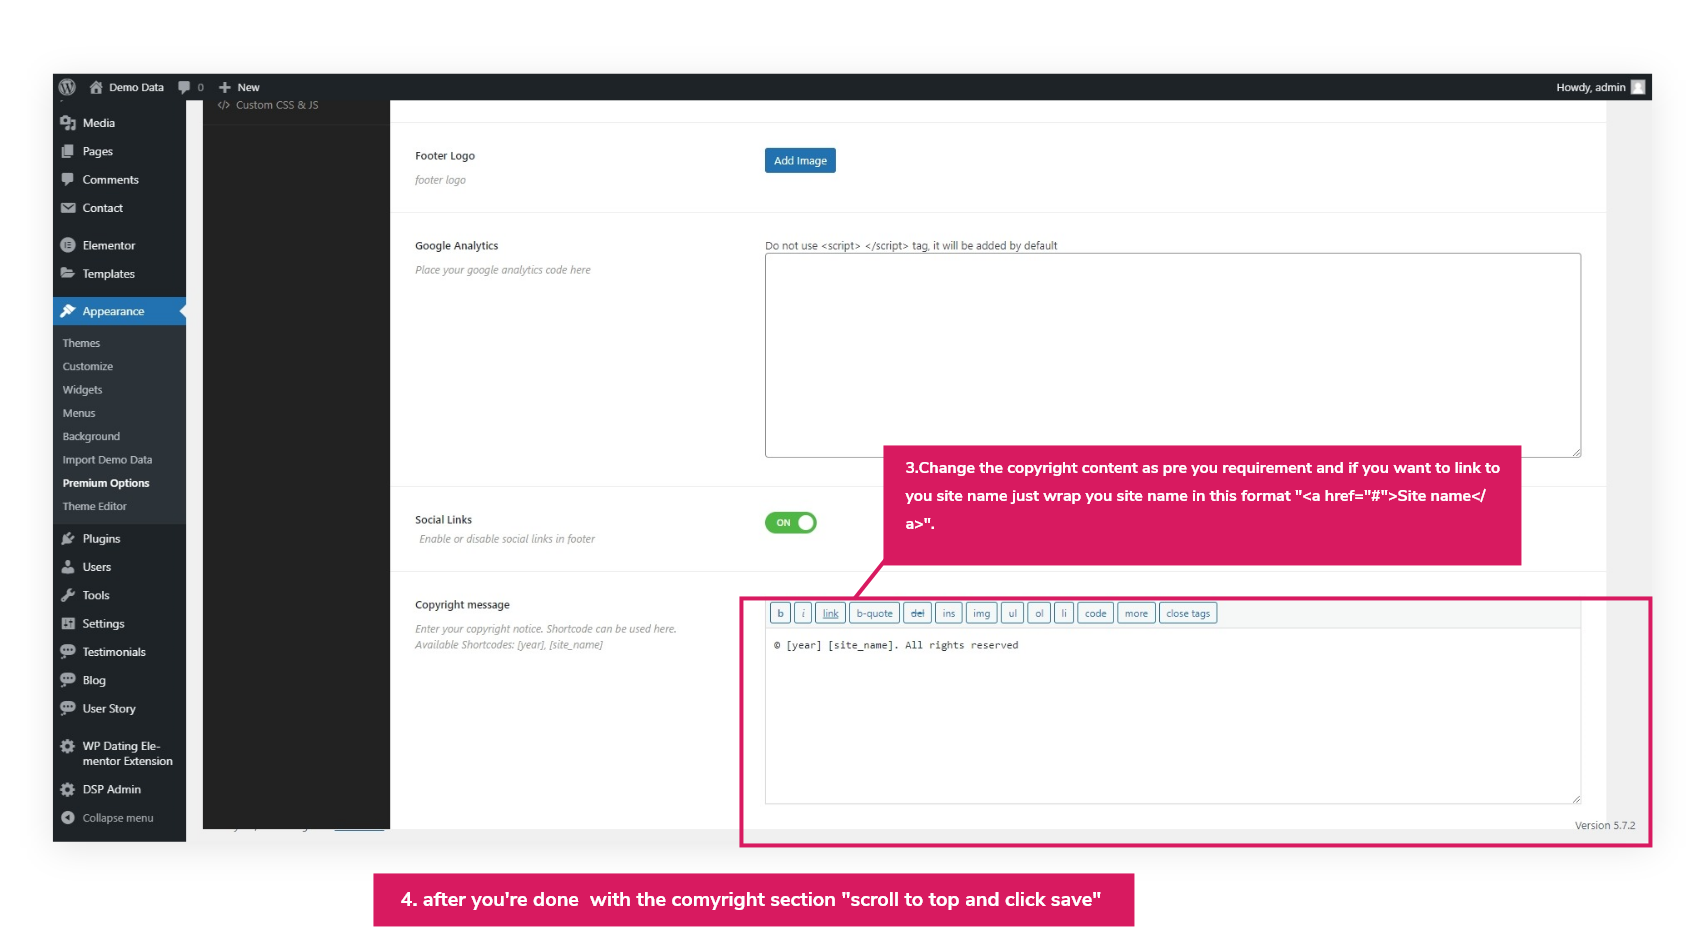
Change the copyright content as per your requirement, and if you want to link to your site name, just wrap your site name in this format “<a href=”#”>Site name</a>.” Now, click Save to save your changes.
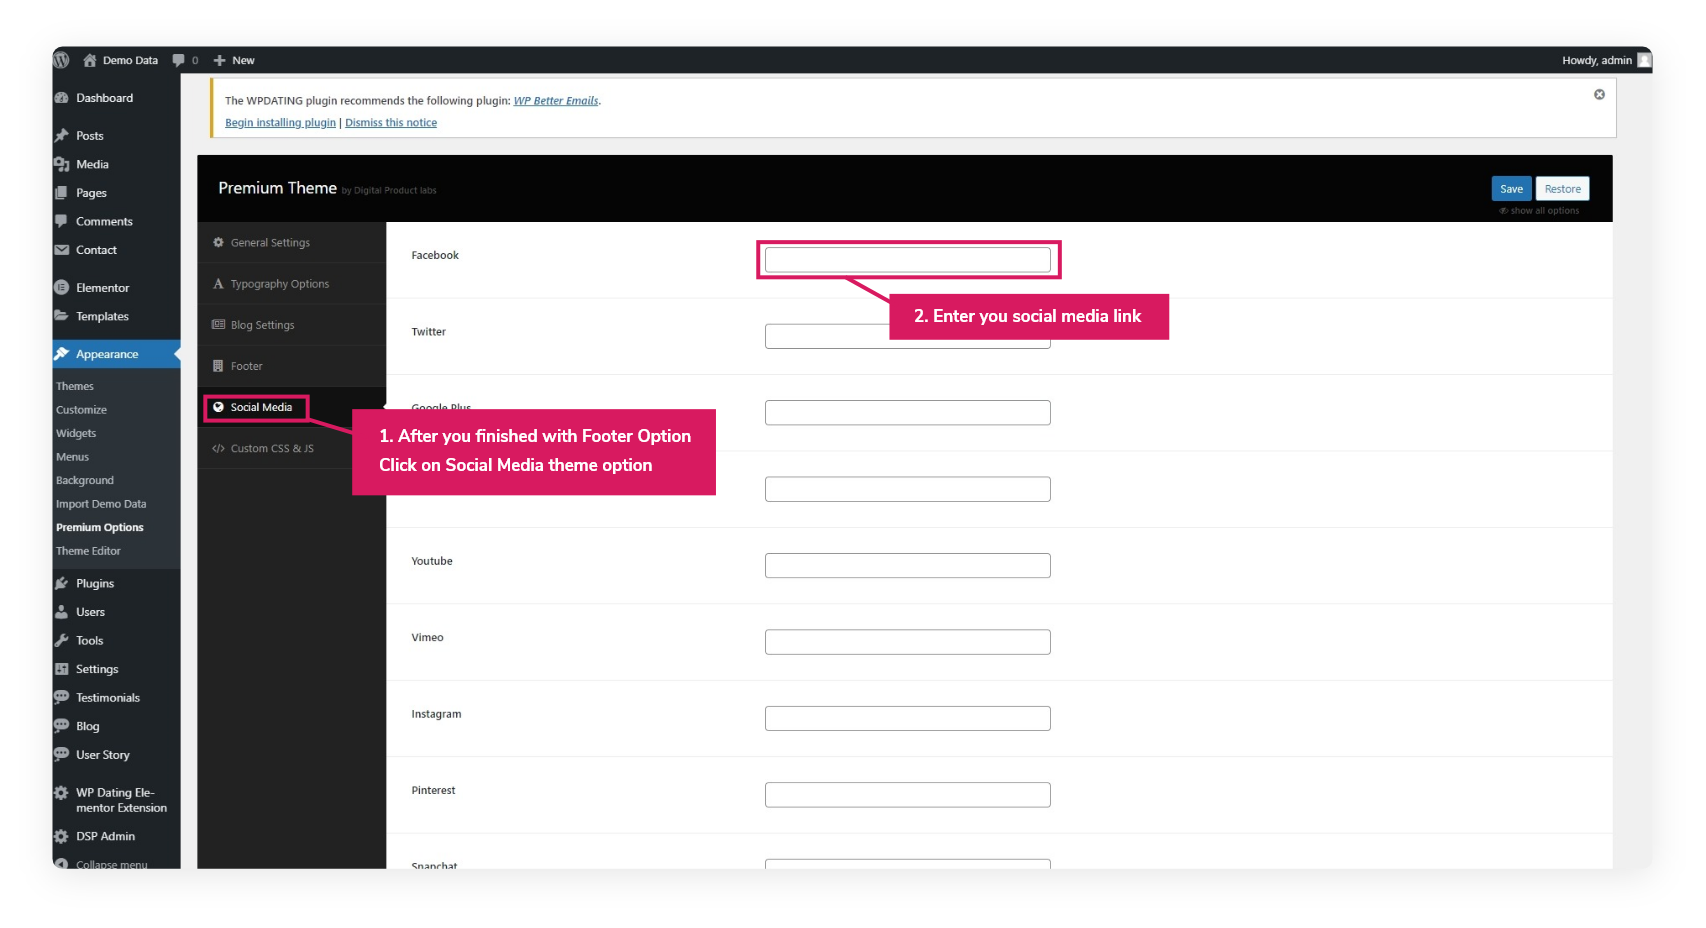
You can also add your social media links. Click on the Social Media theme option and add your social media links. Click Save to save your changes.
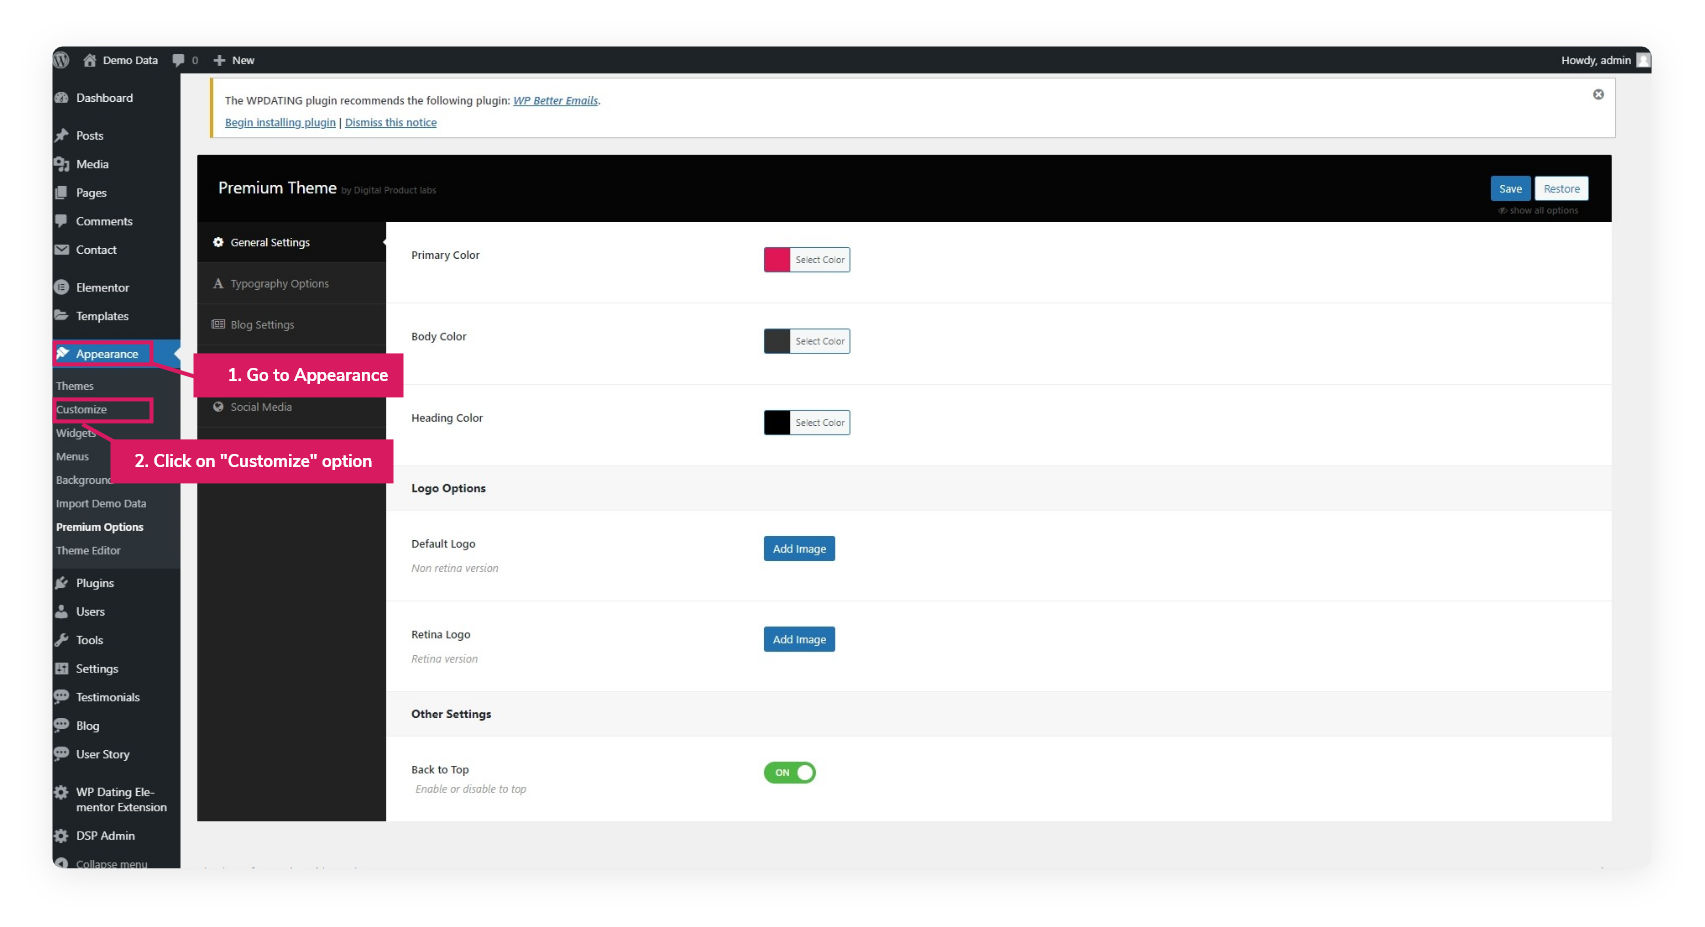
Now, let’s fix the menu items and widgets. Go to Appearance >> Customize.
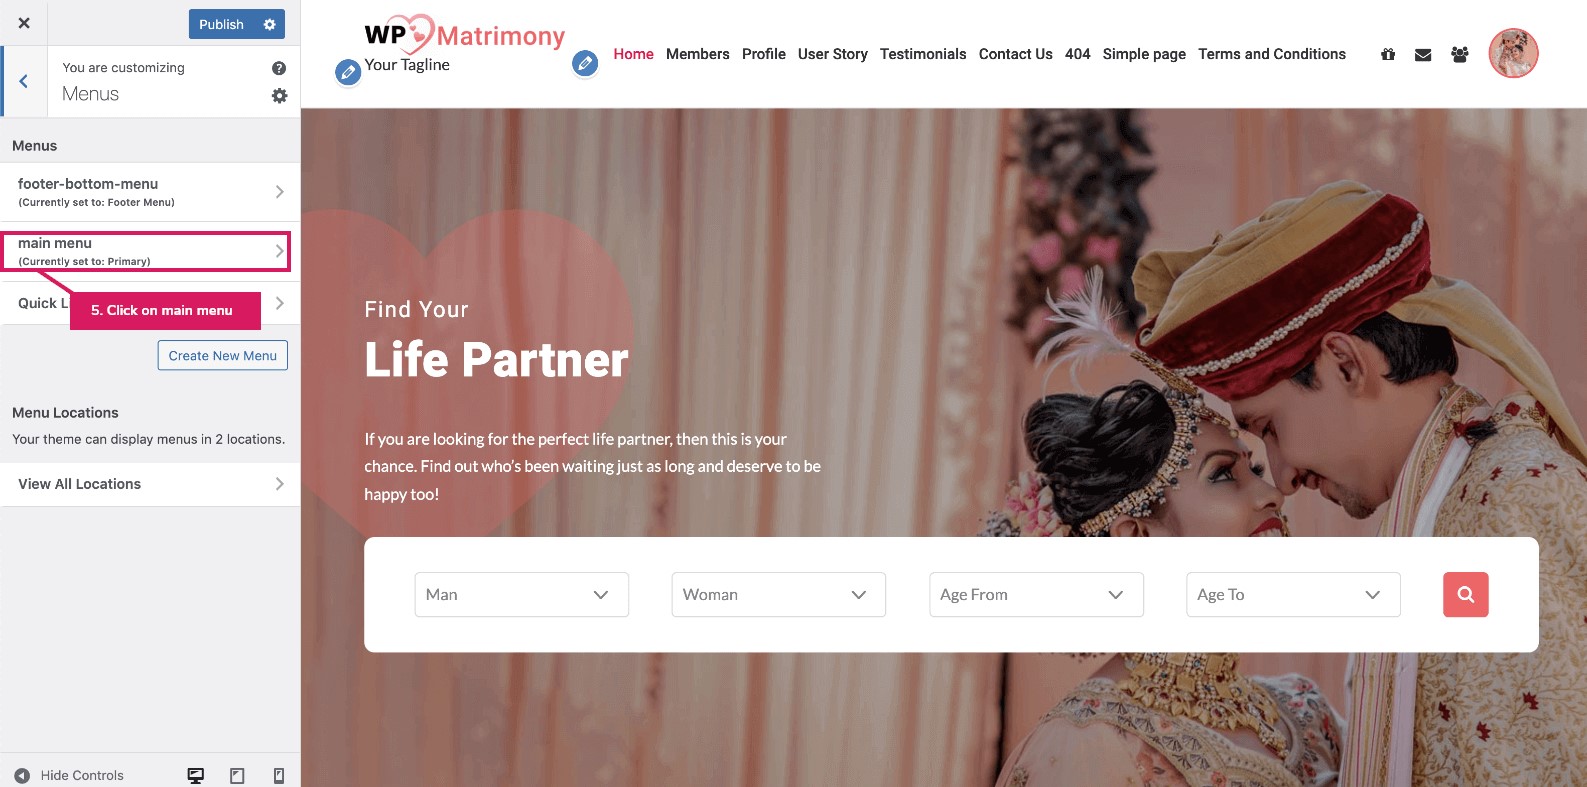
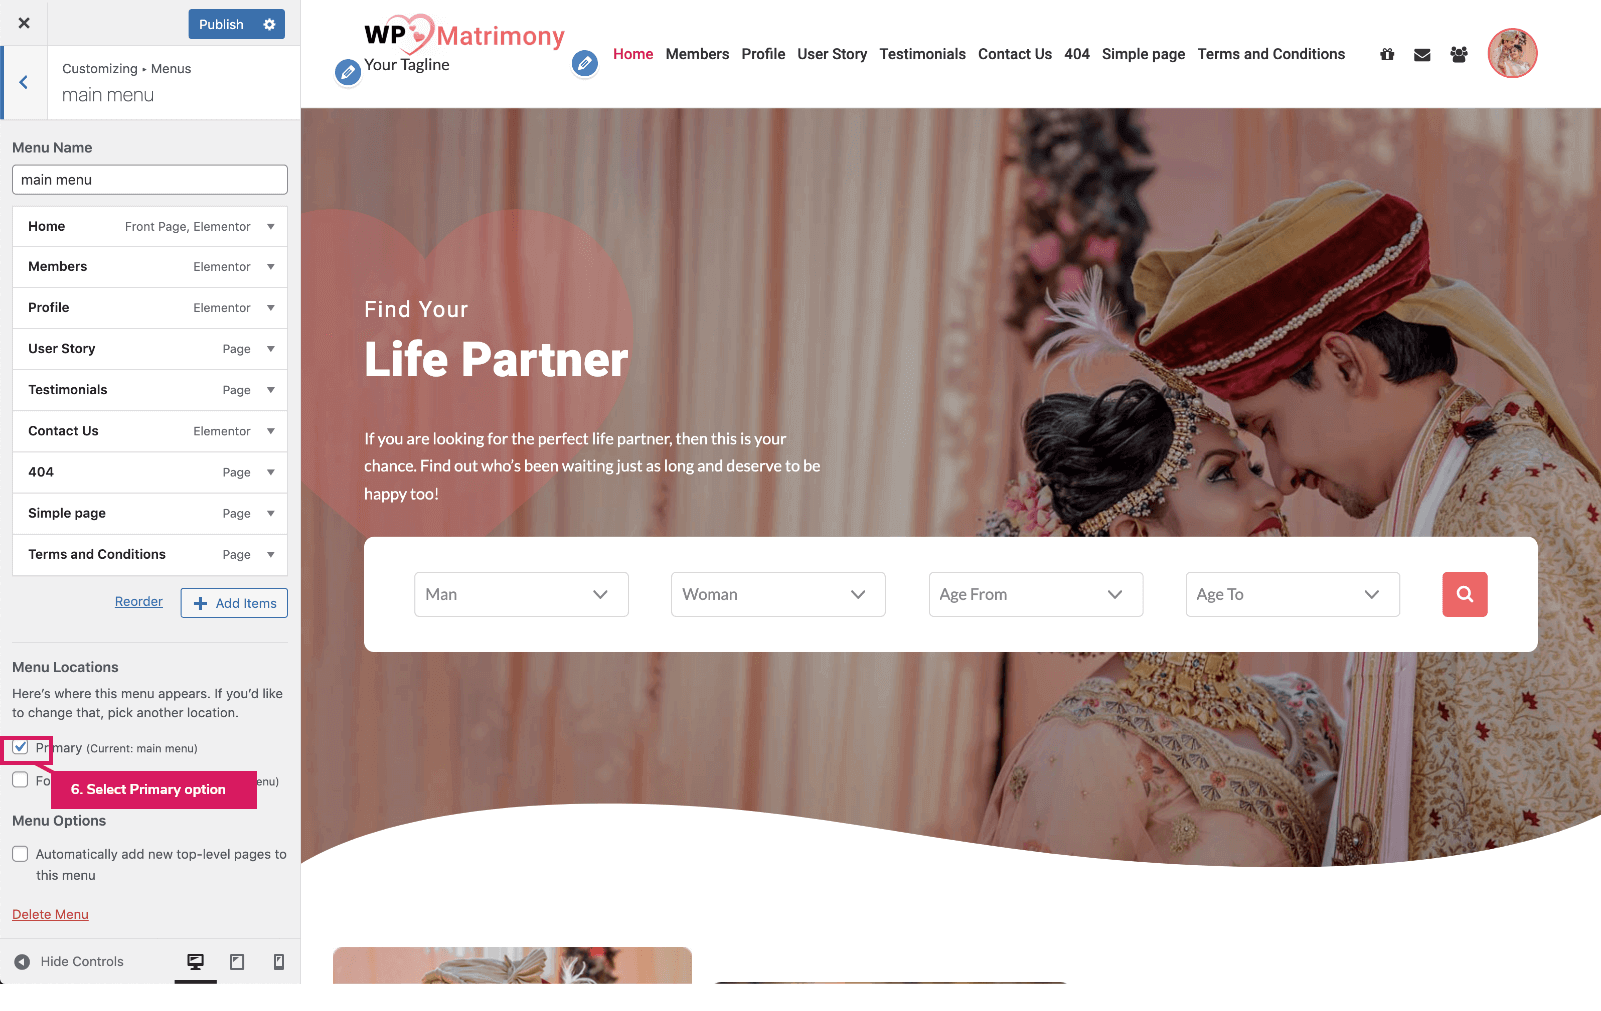
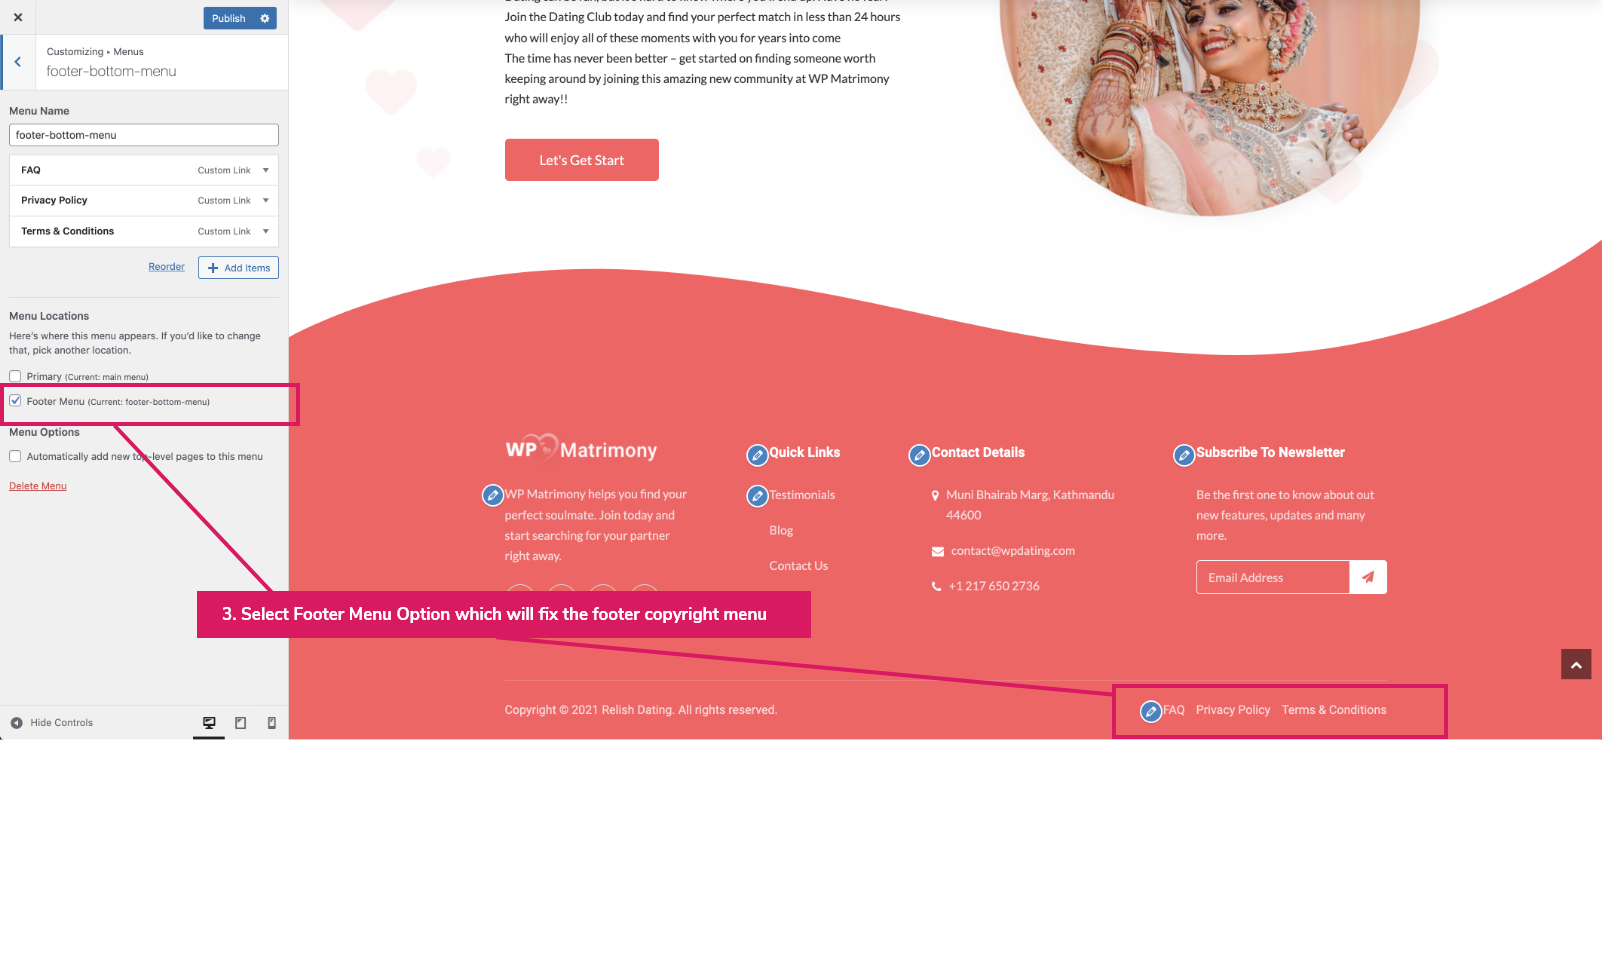
From the WordPress customizer, go to Menus, select your Main Menu, and set it as the Primary menu.
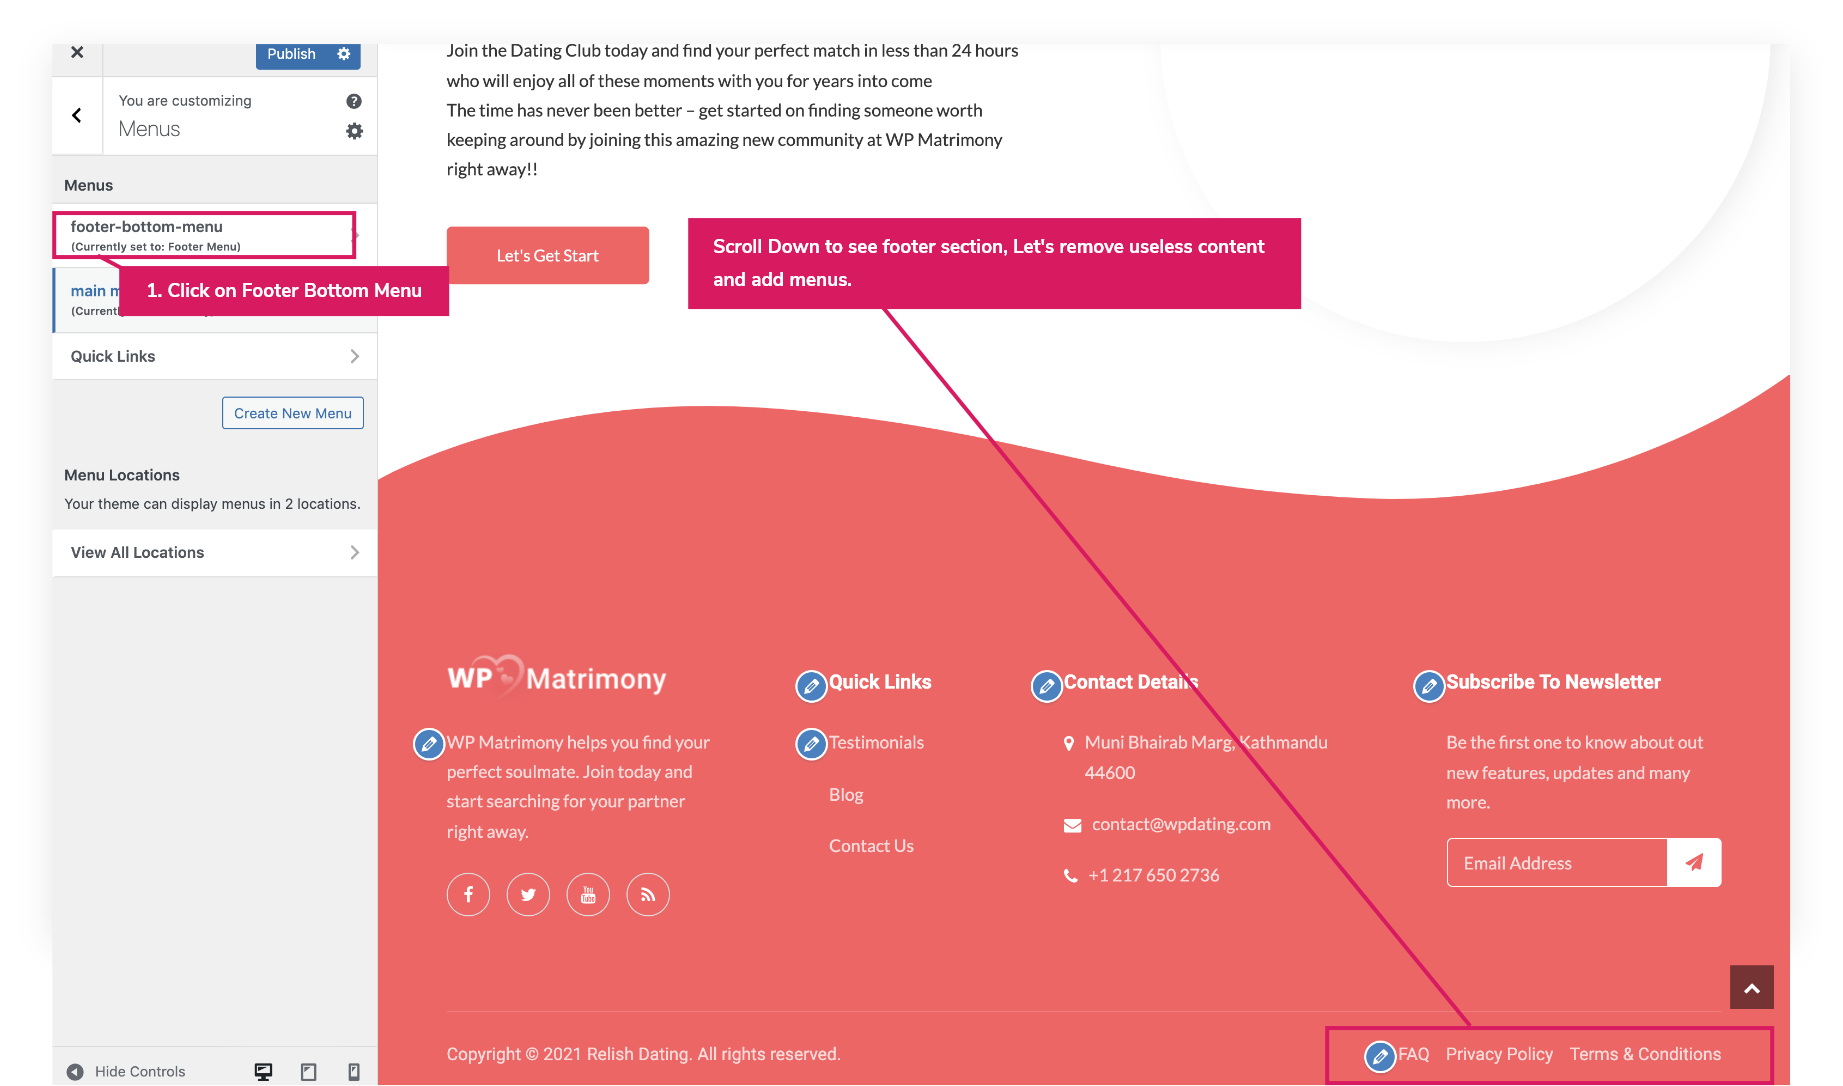
Go back and select footer-bottom-menu as your Footer menu.
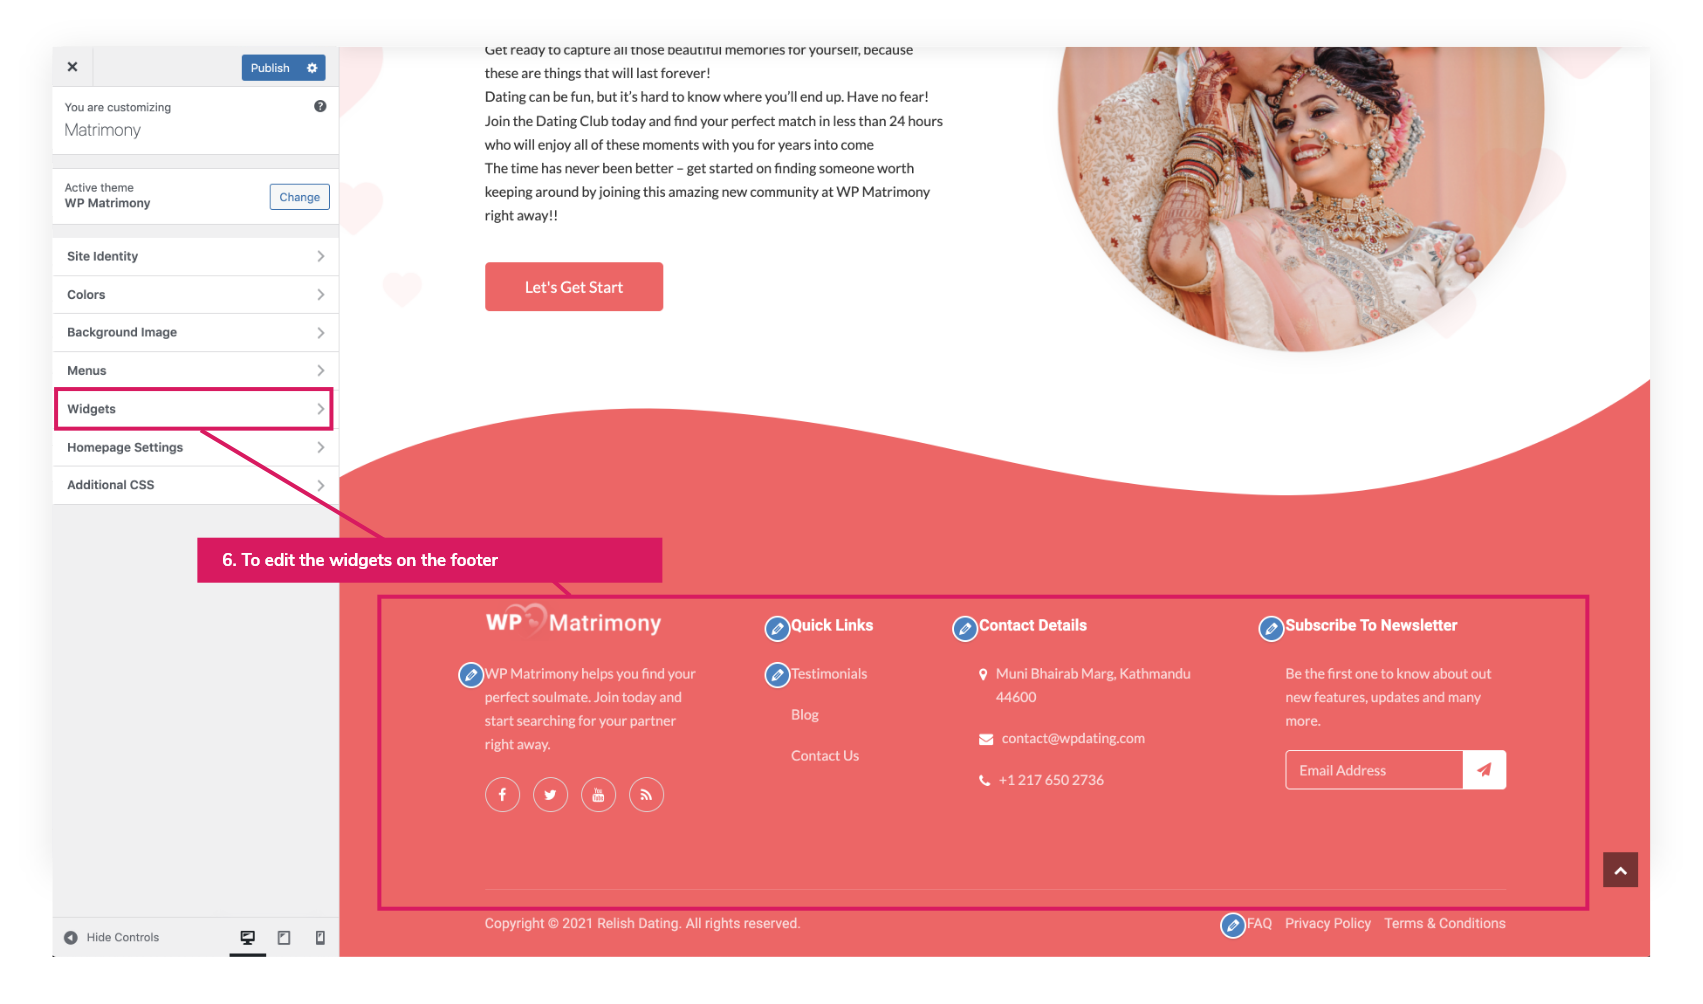
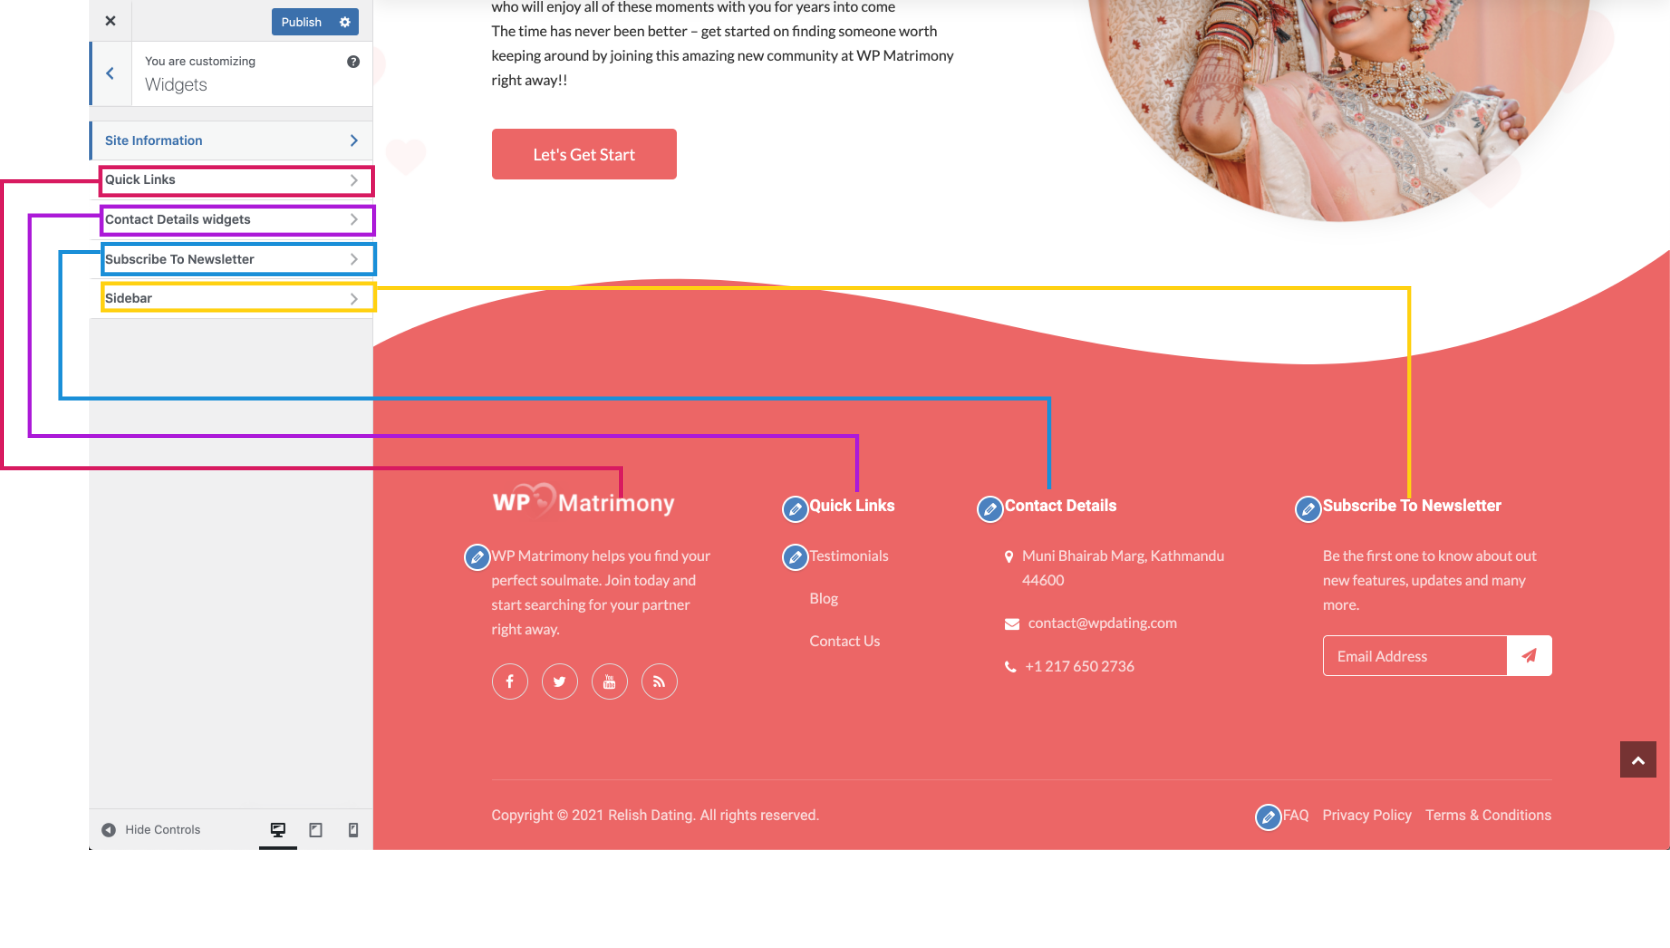
To edit the Footer Section, you can edit them from the Widgets section for Site information, Quick Links, Contact Details Widgets, and Subscribe to Newsletter.
That’s All! You have now successfully installed the WP Matrimony theme. If you have any difficulty in the installation process, please contact our support team at support@wpdating.com.