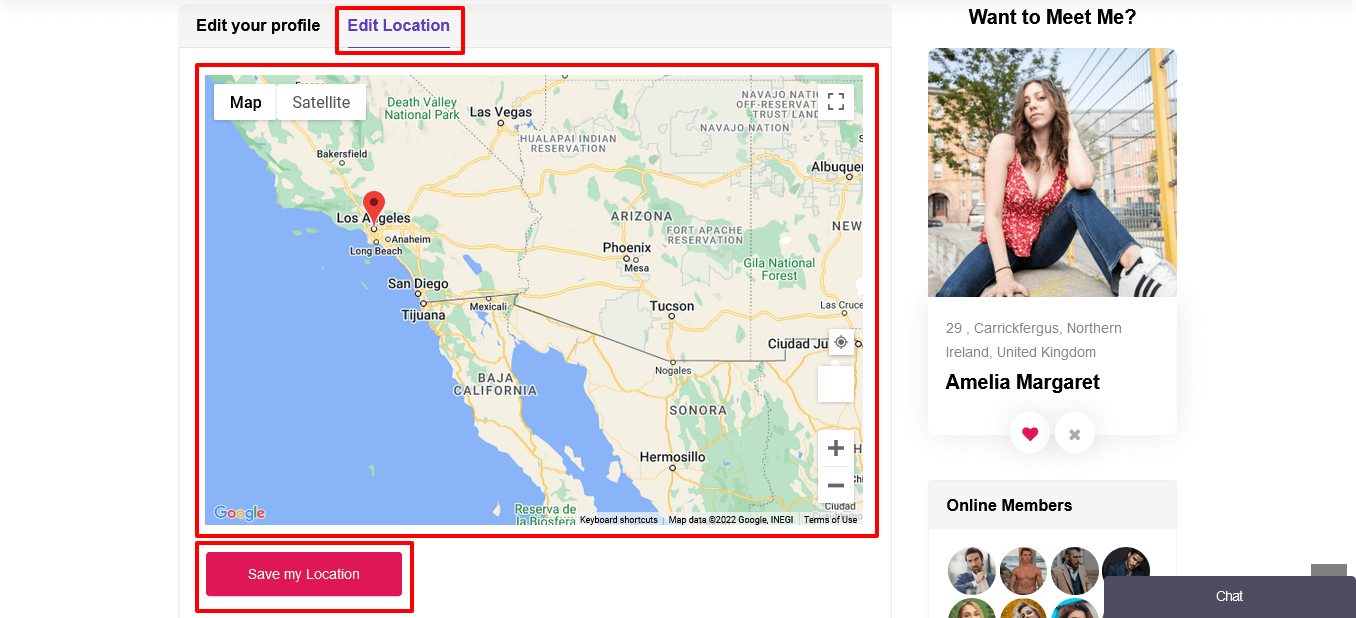
WPDating Plugin has a very interesting feature called Near Me, which displays users near your location. This feature uses Google Maps. So, to use this feature, you will need to integrate the Google Maps API key on your WPDating Admin Settings.
In this documentation, we will learn how we can generate and integrate Google Maps on our site.
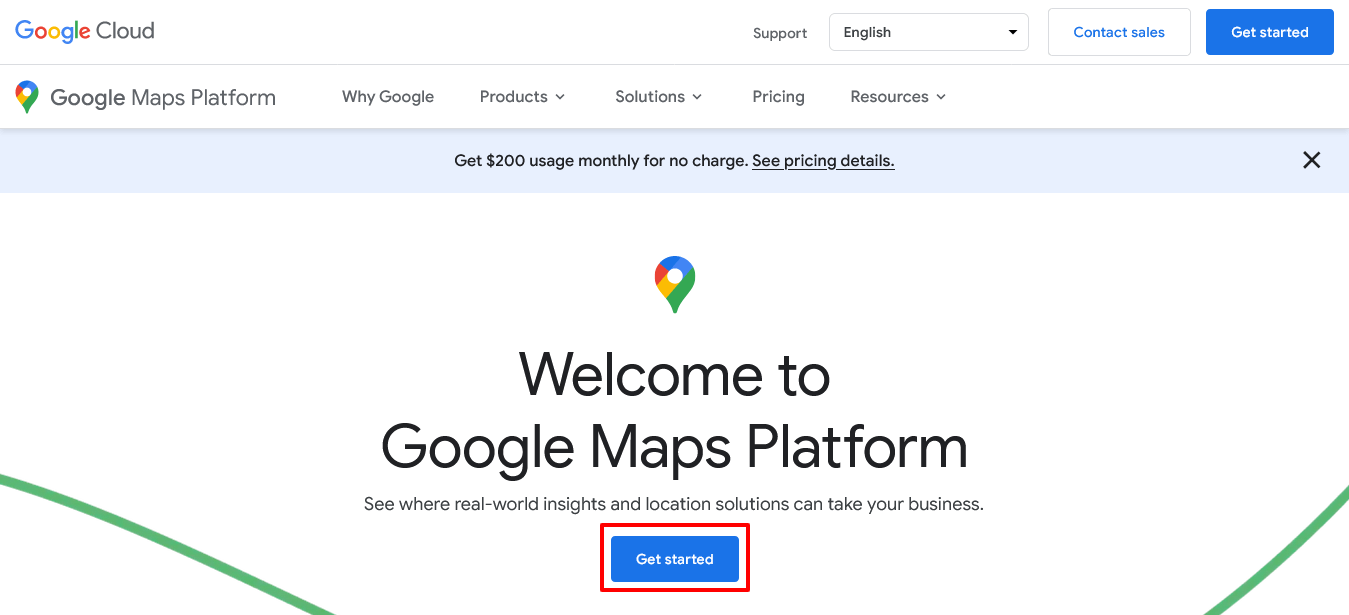
Firstly, please go to your Google Maps Platform. Then, click on Get Started CTA(Call To Action)button at the center of the page.
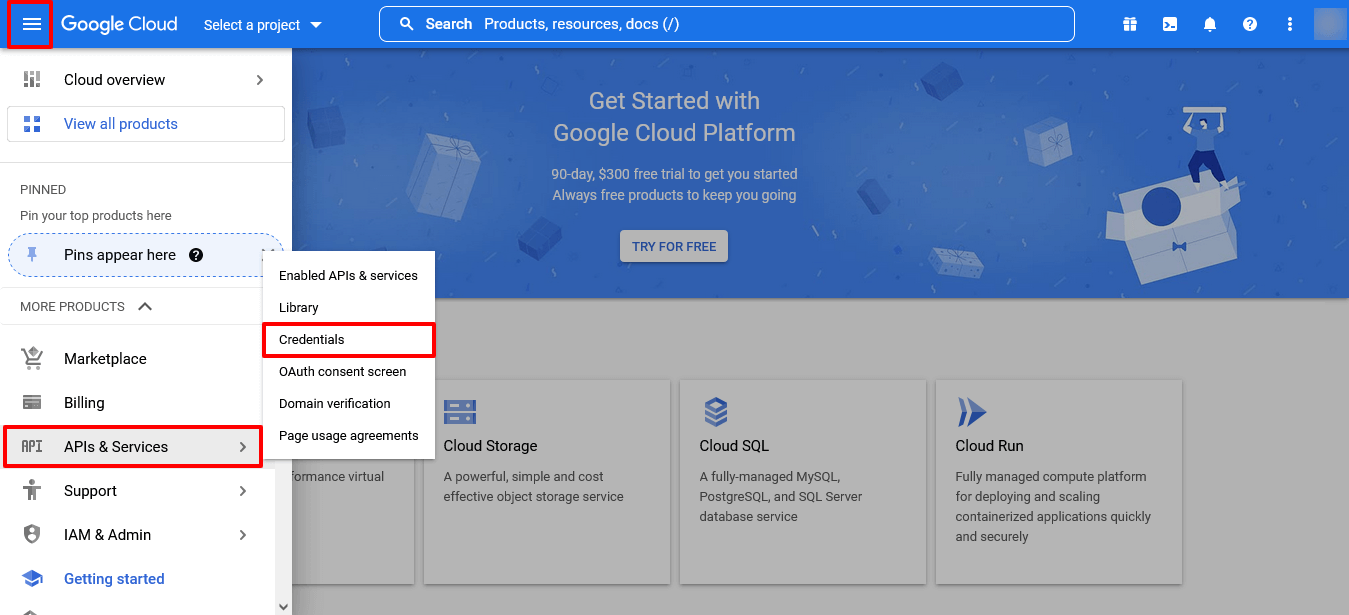
Now, click on the Hamburger icon on the top left corner of your Google Cloud page. Hover to APIs & Services and go to Credentials.
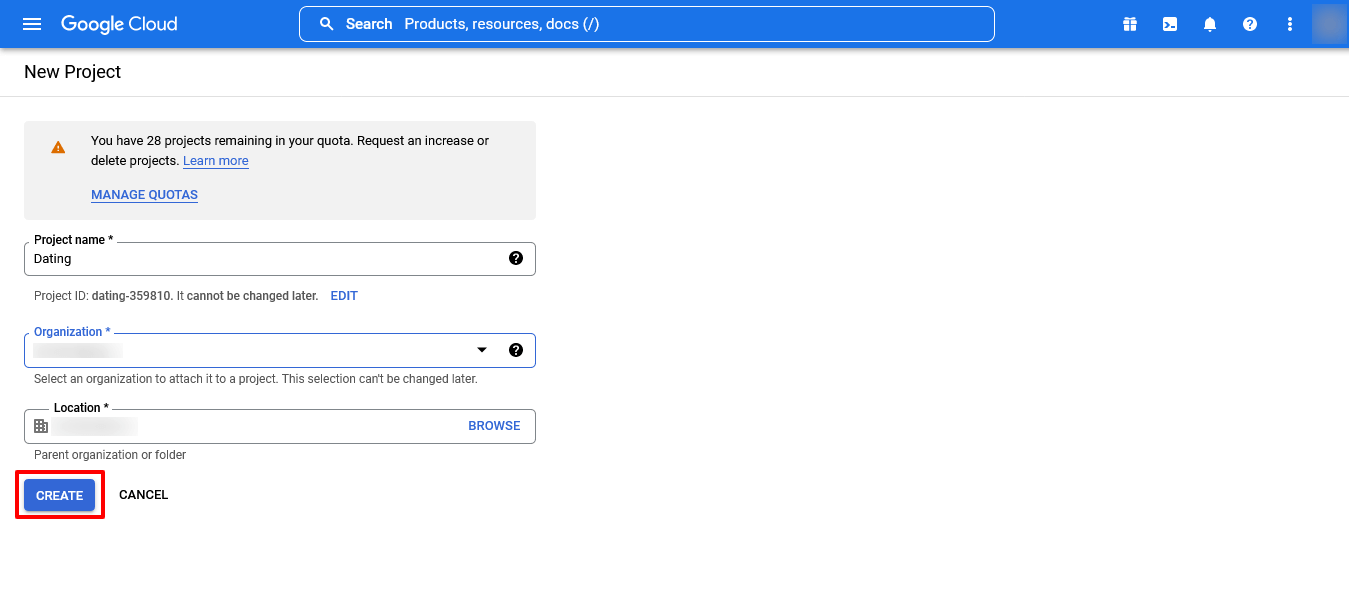
Please select an existing project from the list if you want to use it. Otherwise, select ‘Create a new project’ and enter a project name.
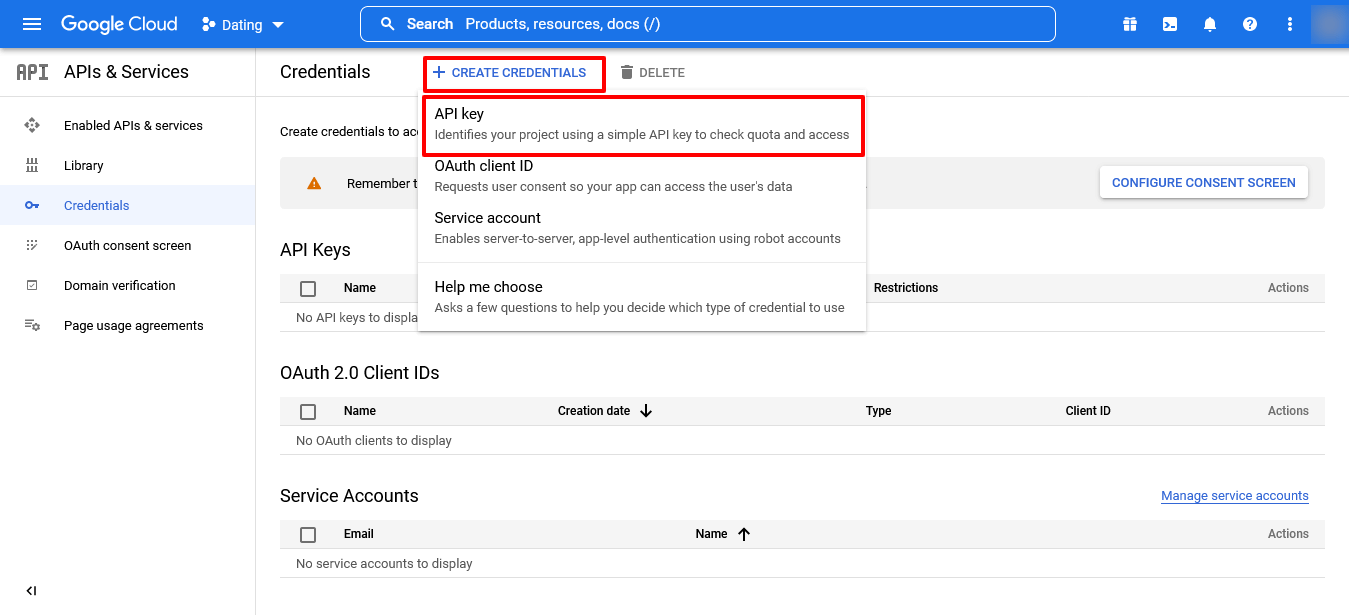
Click on Create Credentials on the top menu and select the API key.
You will see a new dialog that displays the newly created API key.
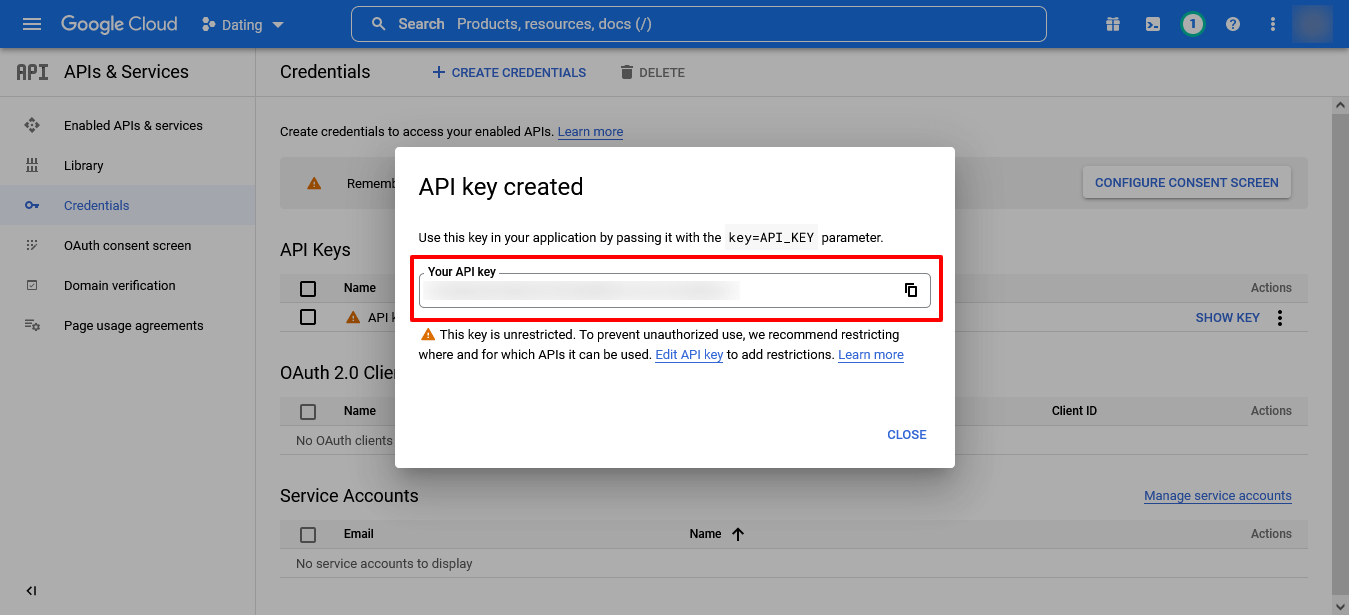
Click on your API Key from the list of your API Keys. You will need to restrict your API to use it our your site only.

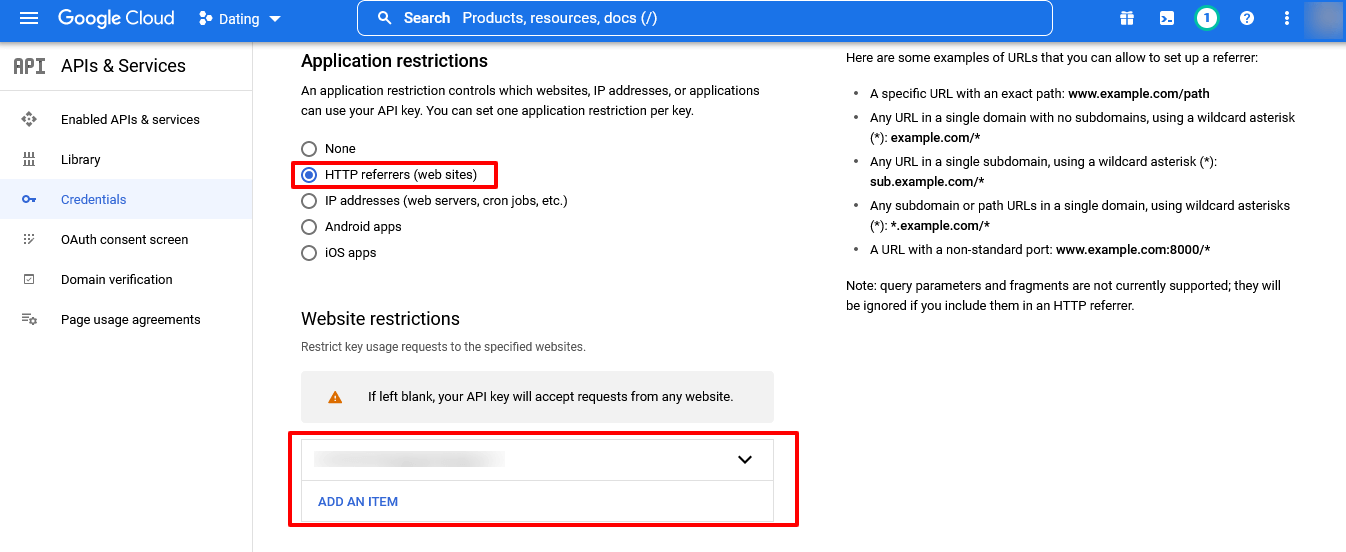
Then, in the Application restrictions, select HTTP referrers(web sites) and on the Website restrictions, click on Add An Item and add your site name, for example, example.com.
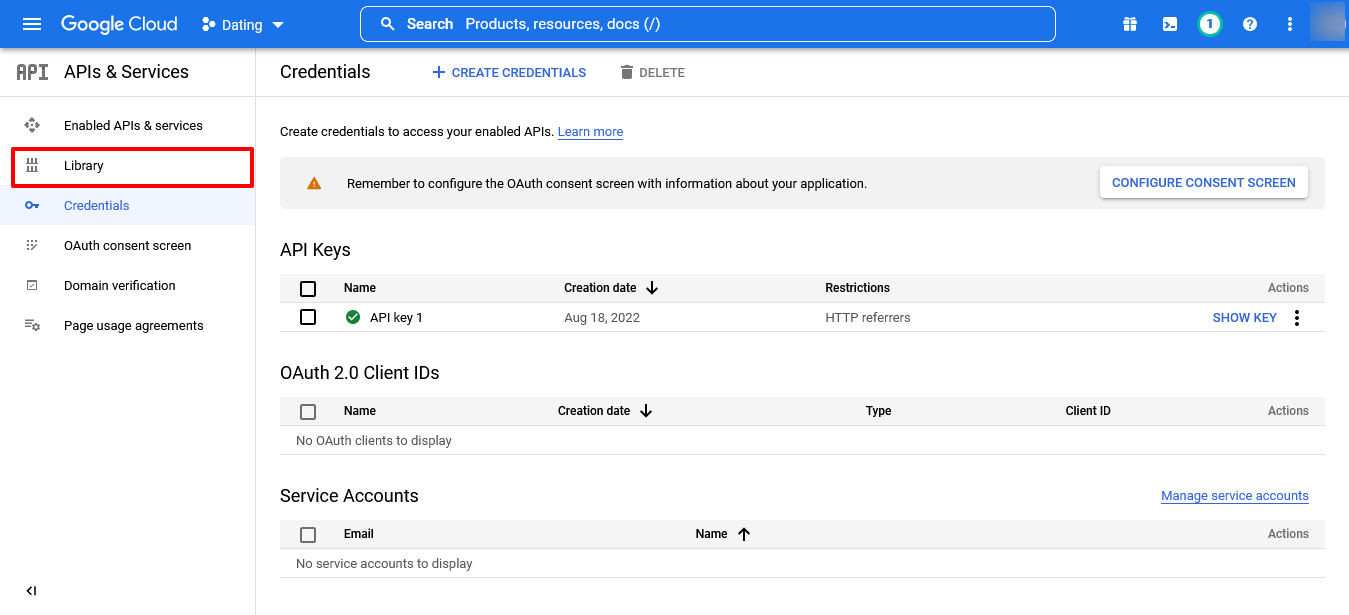
Now, click on the Library tab in the sidebar panel.
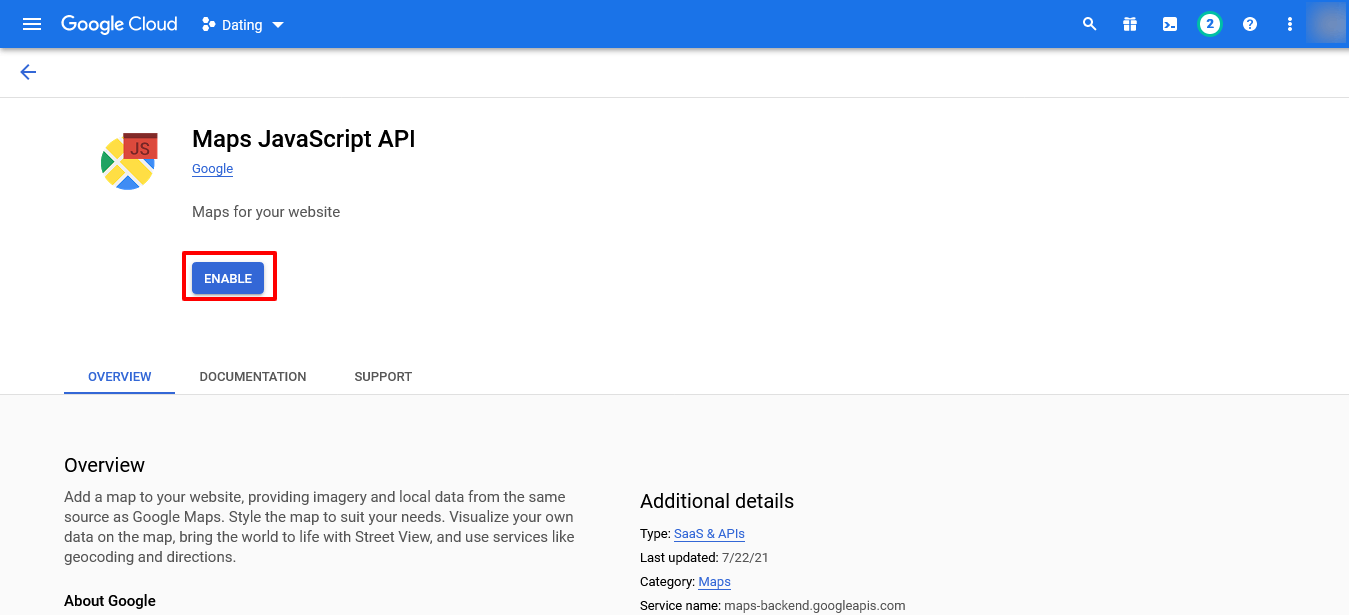
Then, on the API Library page, select Maps JavaScript API.

Enable the Maps JavaScript API by clicking on the Enable button.
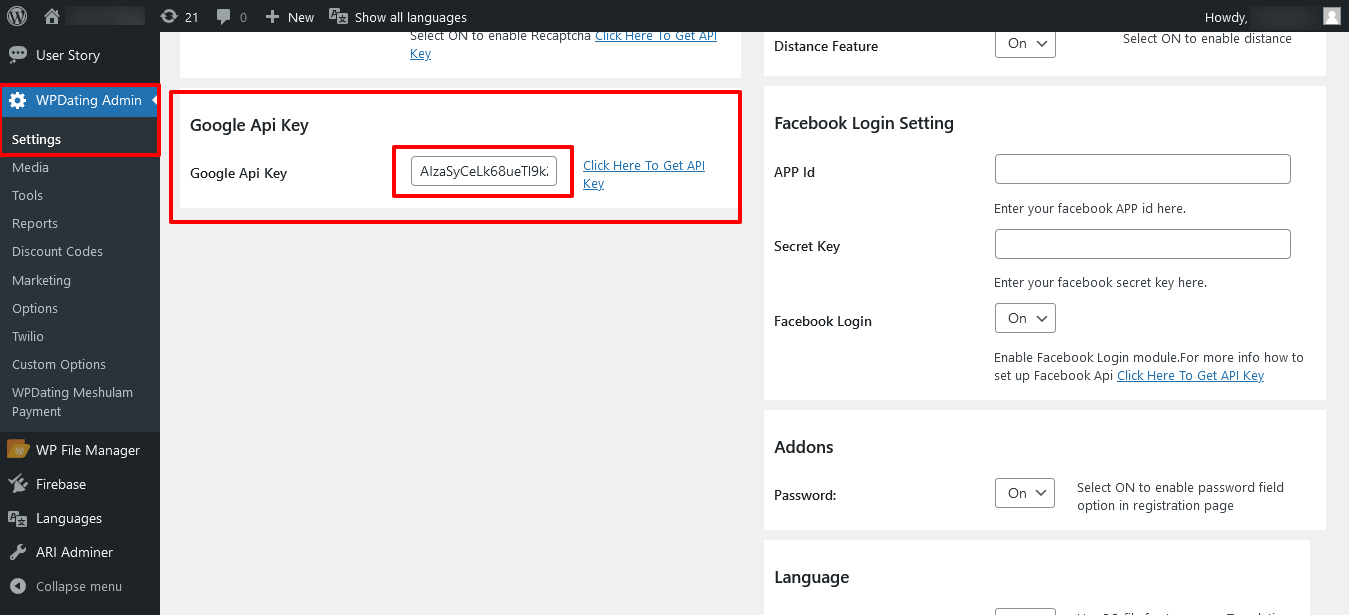
Finally, on your WPDating Admin >> Settings page, use the API key and click on the Save Changes button.
That’s it. Now, your site has Google Maps integrated into it, and the Near Me feature should work well.
If you still have any issues or confusion while following this documentation, please kindly contact our support team at https://www.wpdating.com/contact/. We will be happy to help you.
Also, you can view how the Near Me feature works at: https://www.wpdating.com/knowledge-base/near-me-feature/.